Star Wars: Frontlines of the Republic
An immersive, miniature-scale theme-park attraction that brings the Republic’s frontlines to life
Demo Videos
(Videos are sped up and trimmed from actual speed due to upload size limits)
Guests find themselves dropped into the jungles of Umbara during the height of the Clone Wars. The 501st has just defeated the rogue General Pong Krell, but the Separatists have used the chaos to seize ground for themselves. At the clone outpost, General Anakin Skywalker briefs you on your objective: locate and destroy a Separatist droid factory hidden in the jungle.
The Story
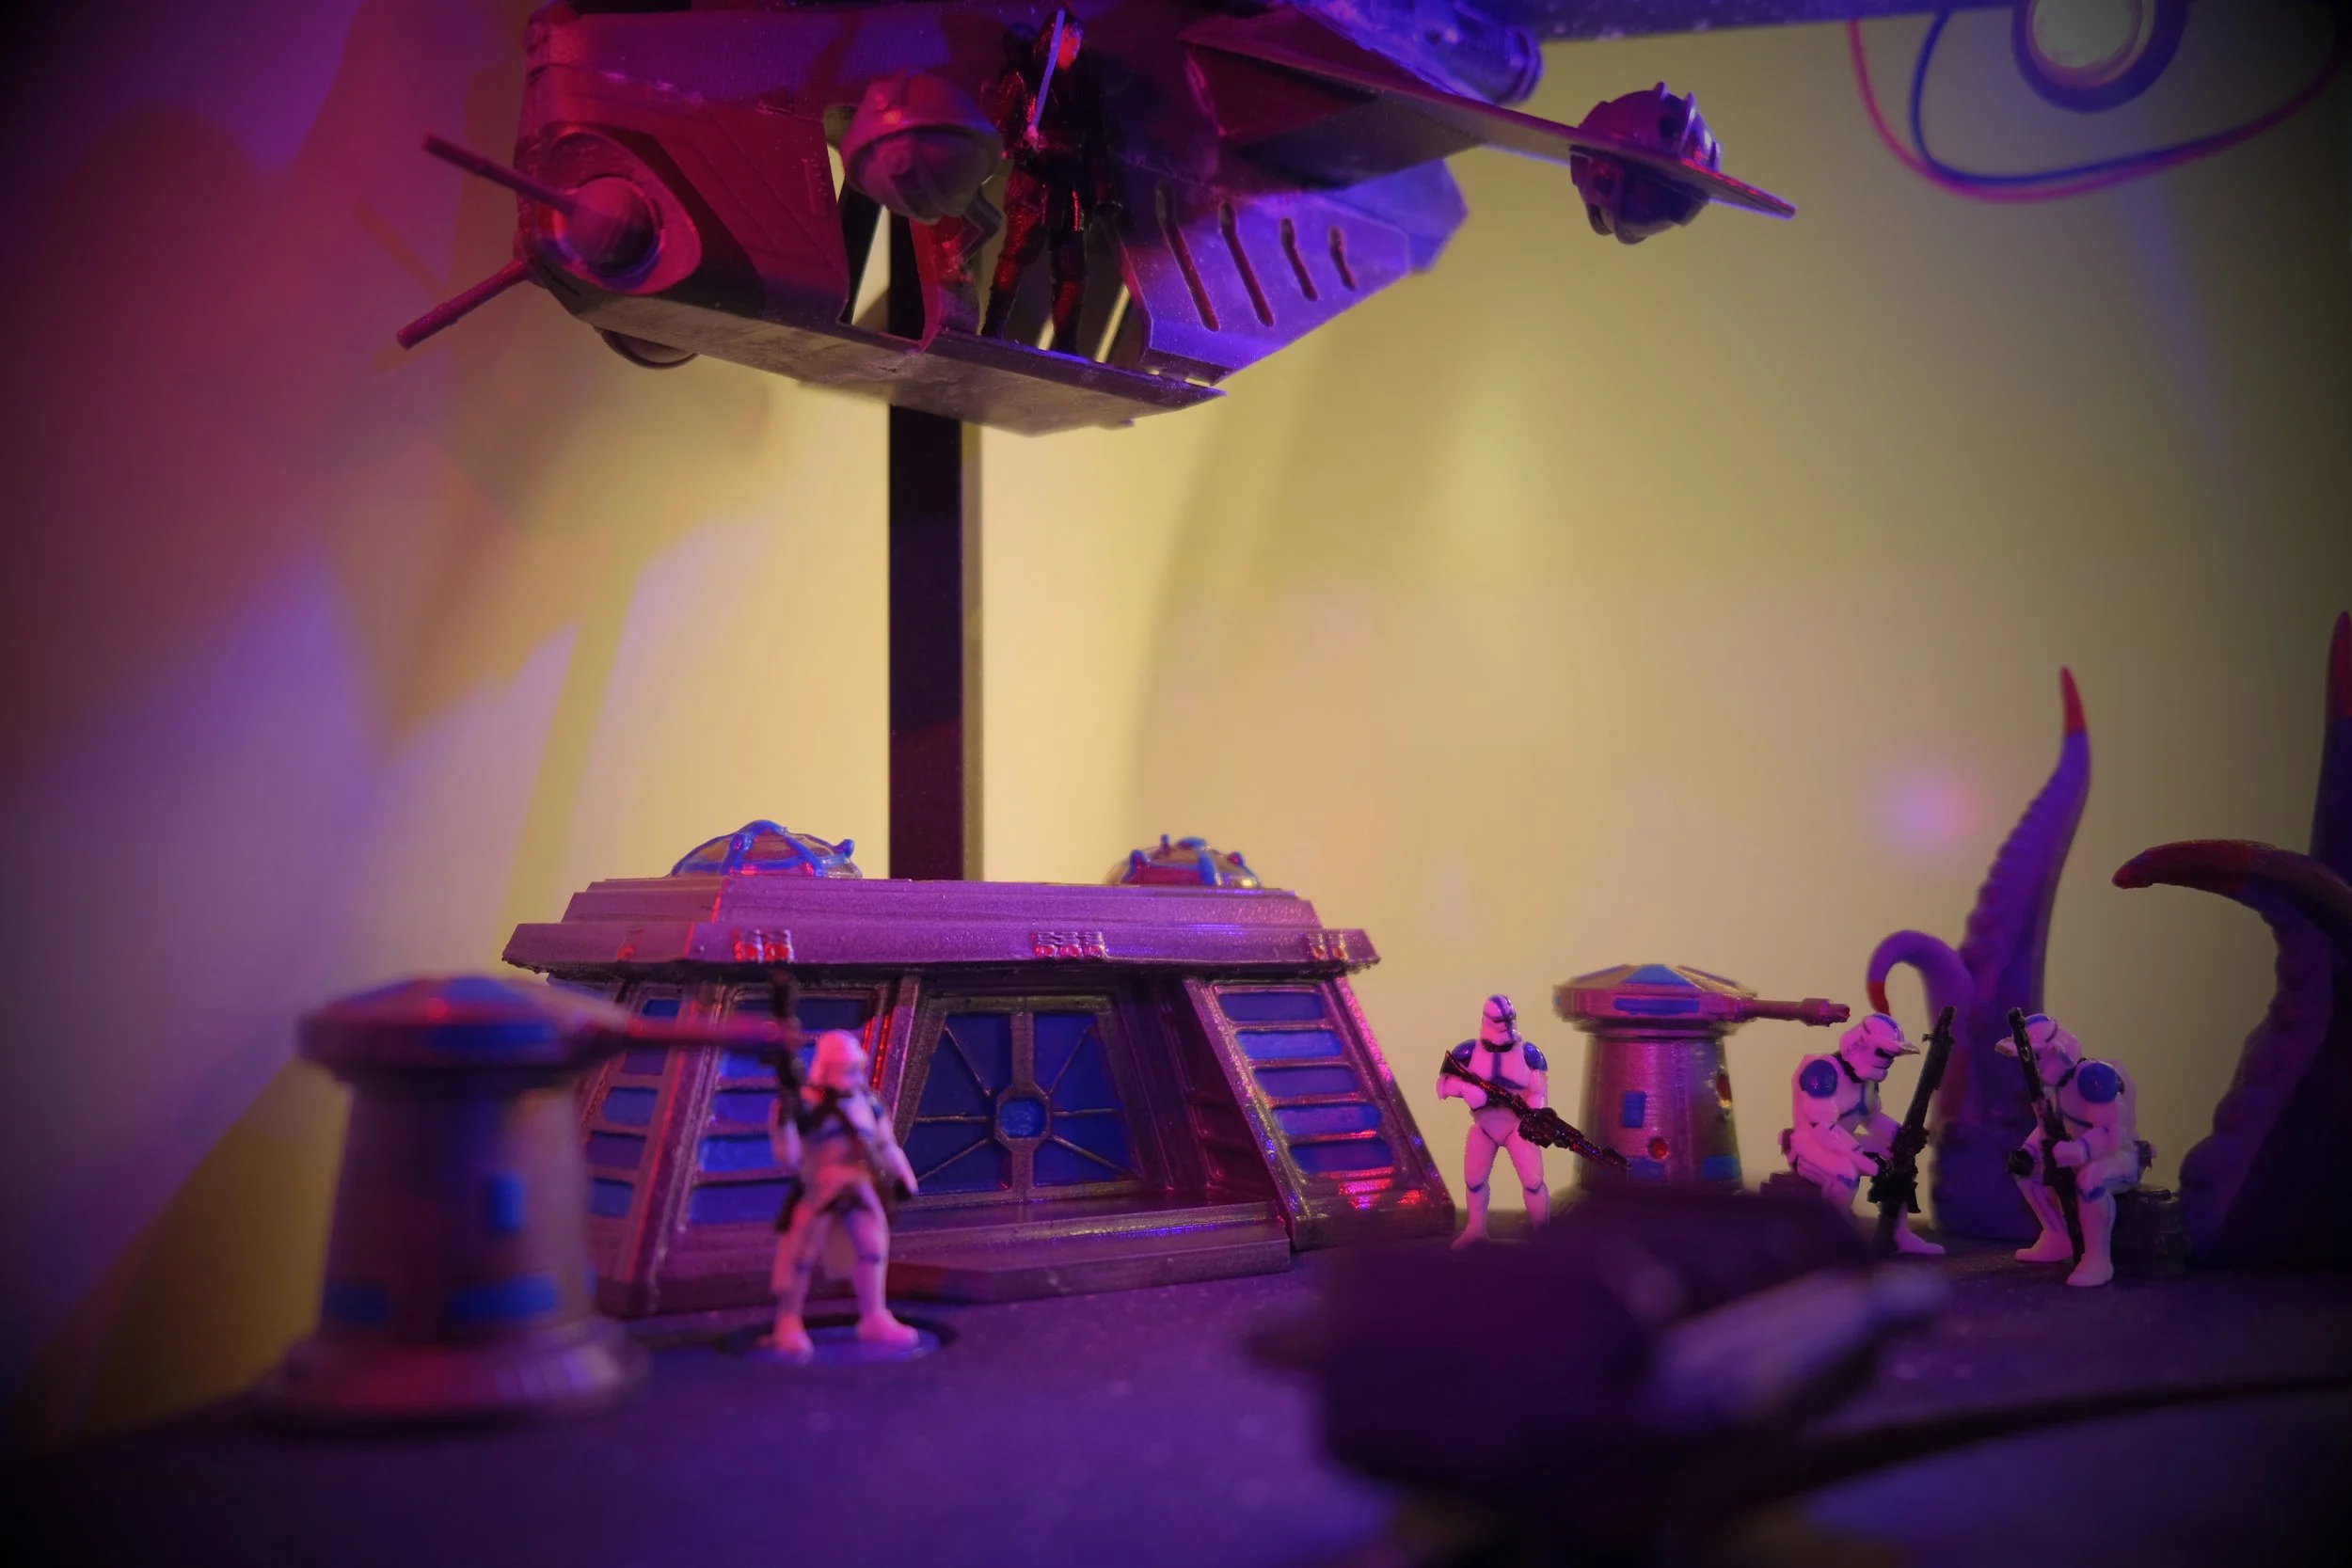
With your orders from General Skywalker in hand, you fall in alongside Captain Rex and the 501st, moving out from the clone outpost and into the dense Umbaran jungle. The canopy overhead blocks out what little light the planet's perpetual twilight offers, and somewhere ahead, hidden among the trees, is the factory you've been sent to find.
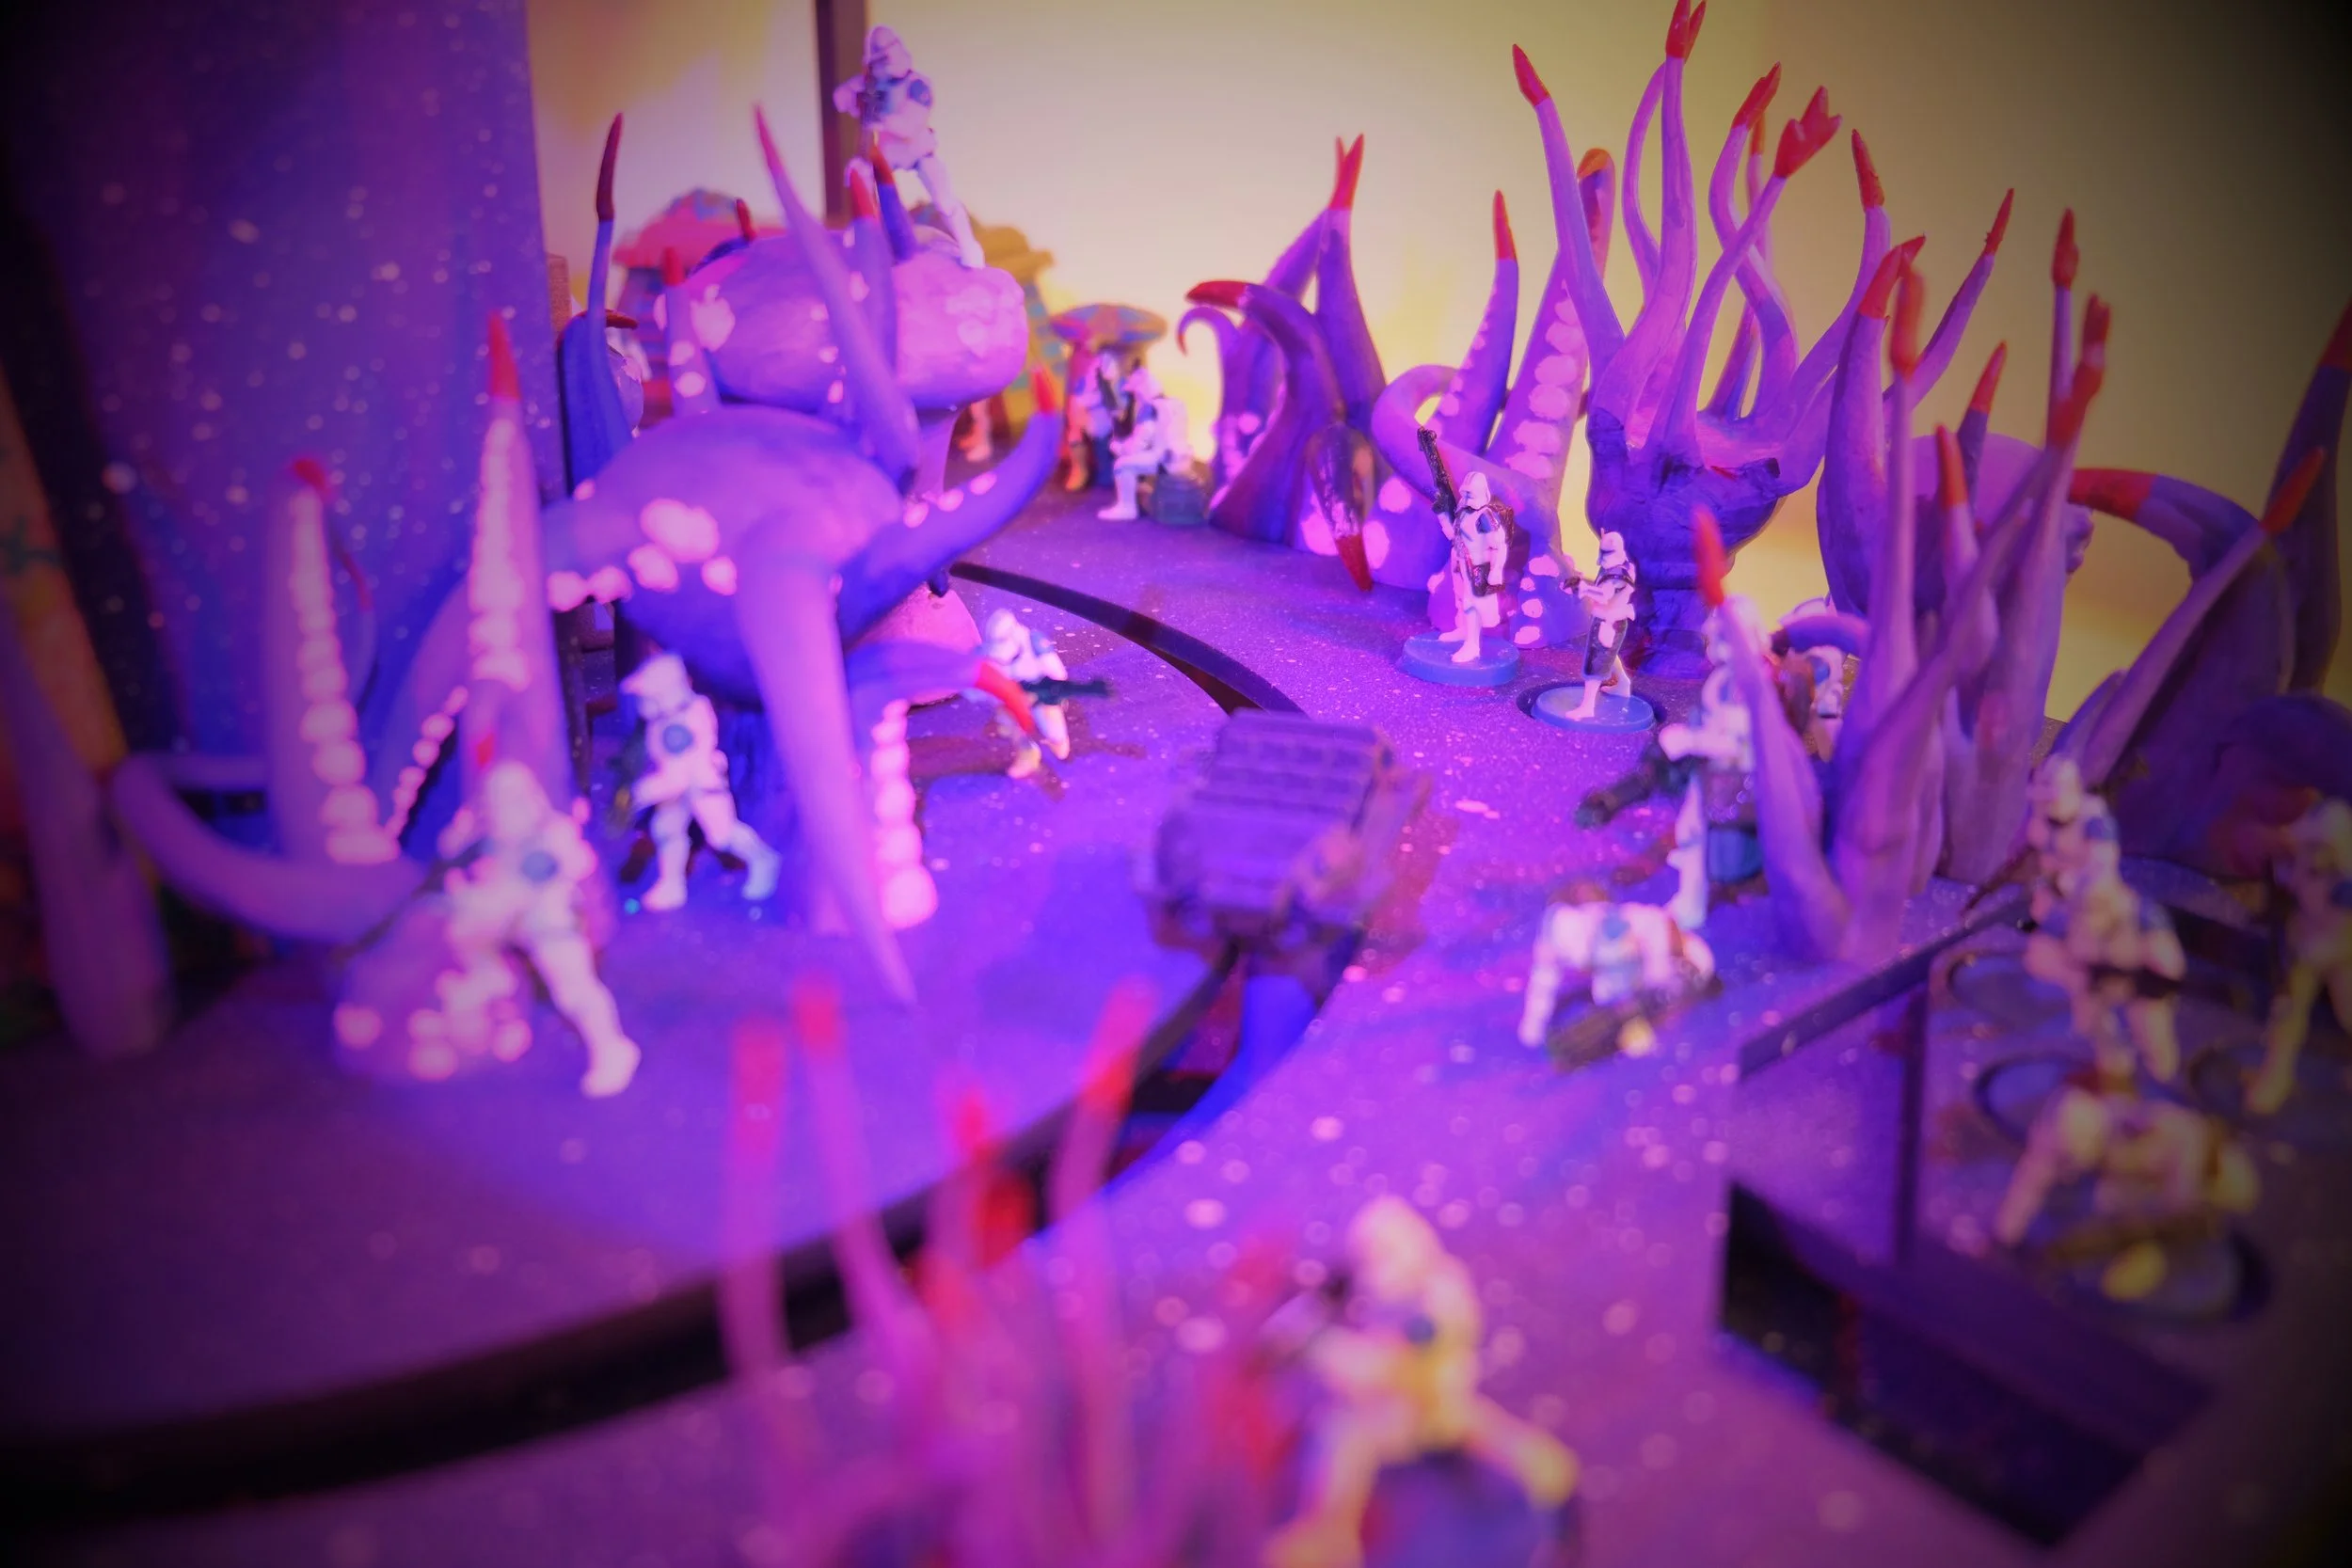
Without warning, the column is hit. A Separatist droid patrol opens fire from the tree line, and in an instant, you're caught in the crossfire between the 501st and the advancing droid forces, while blaster bolts cut through the jungle as Rex and his men scramble to hold the line.
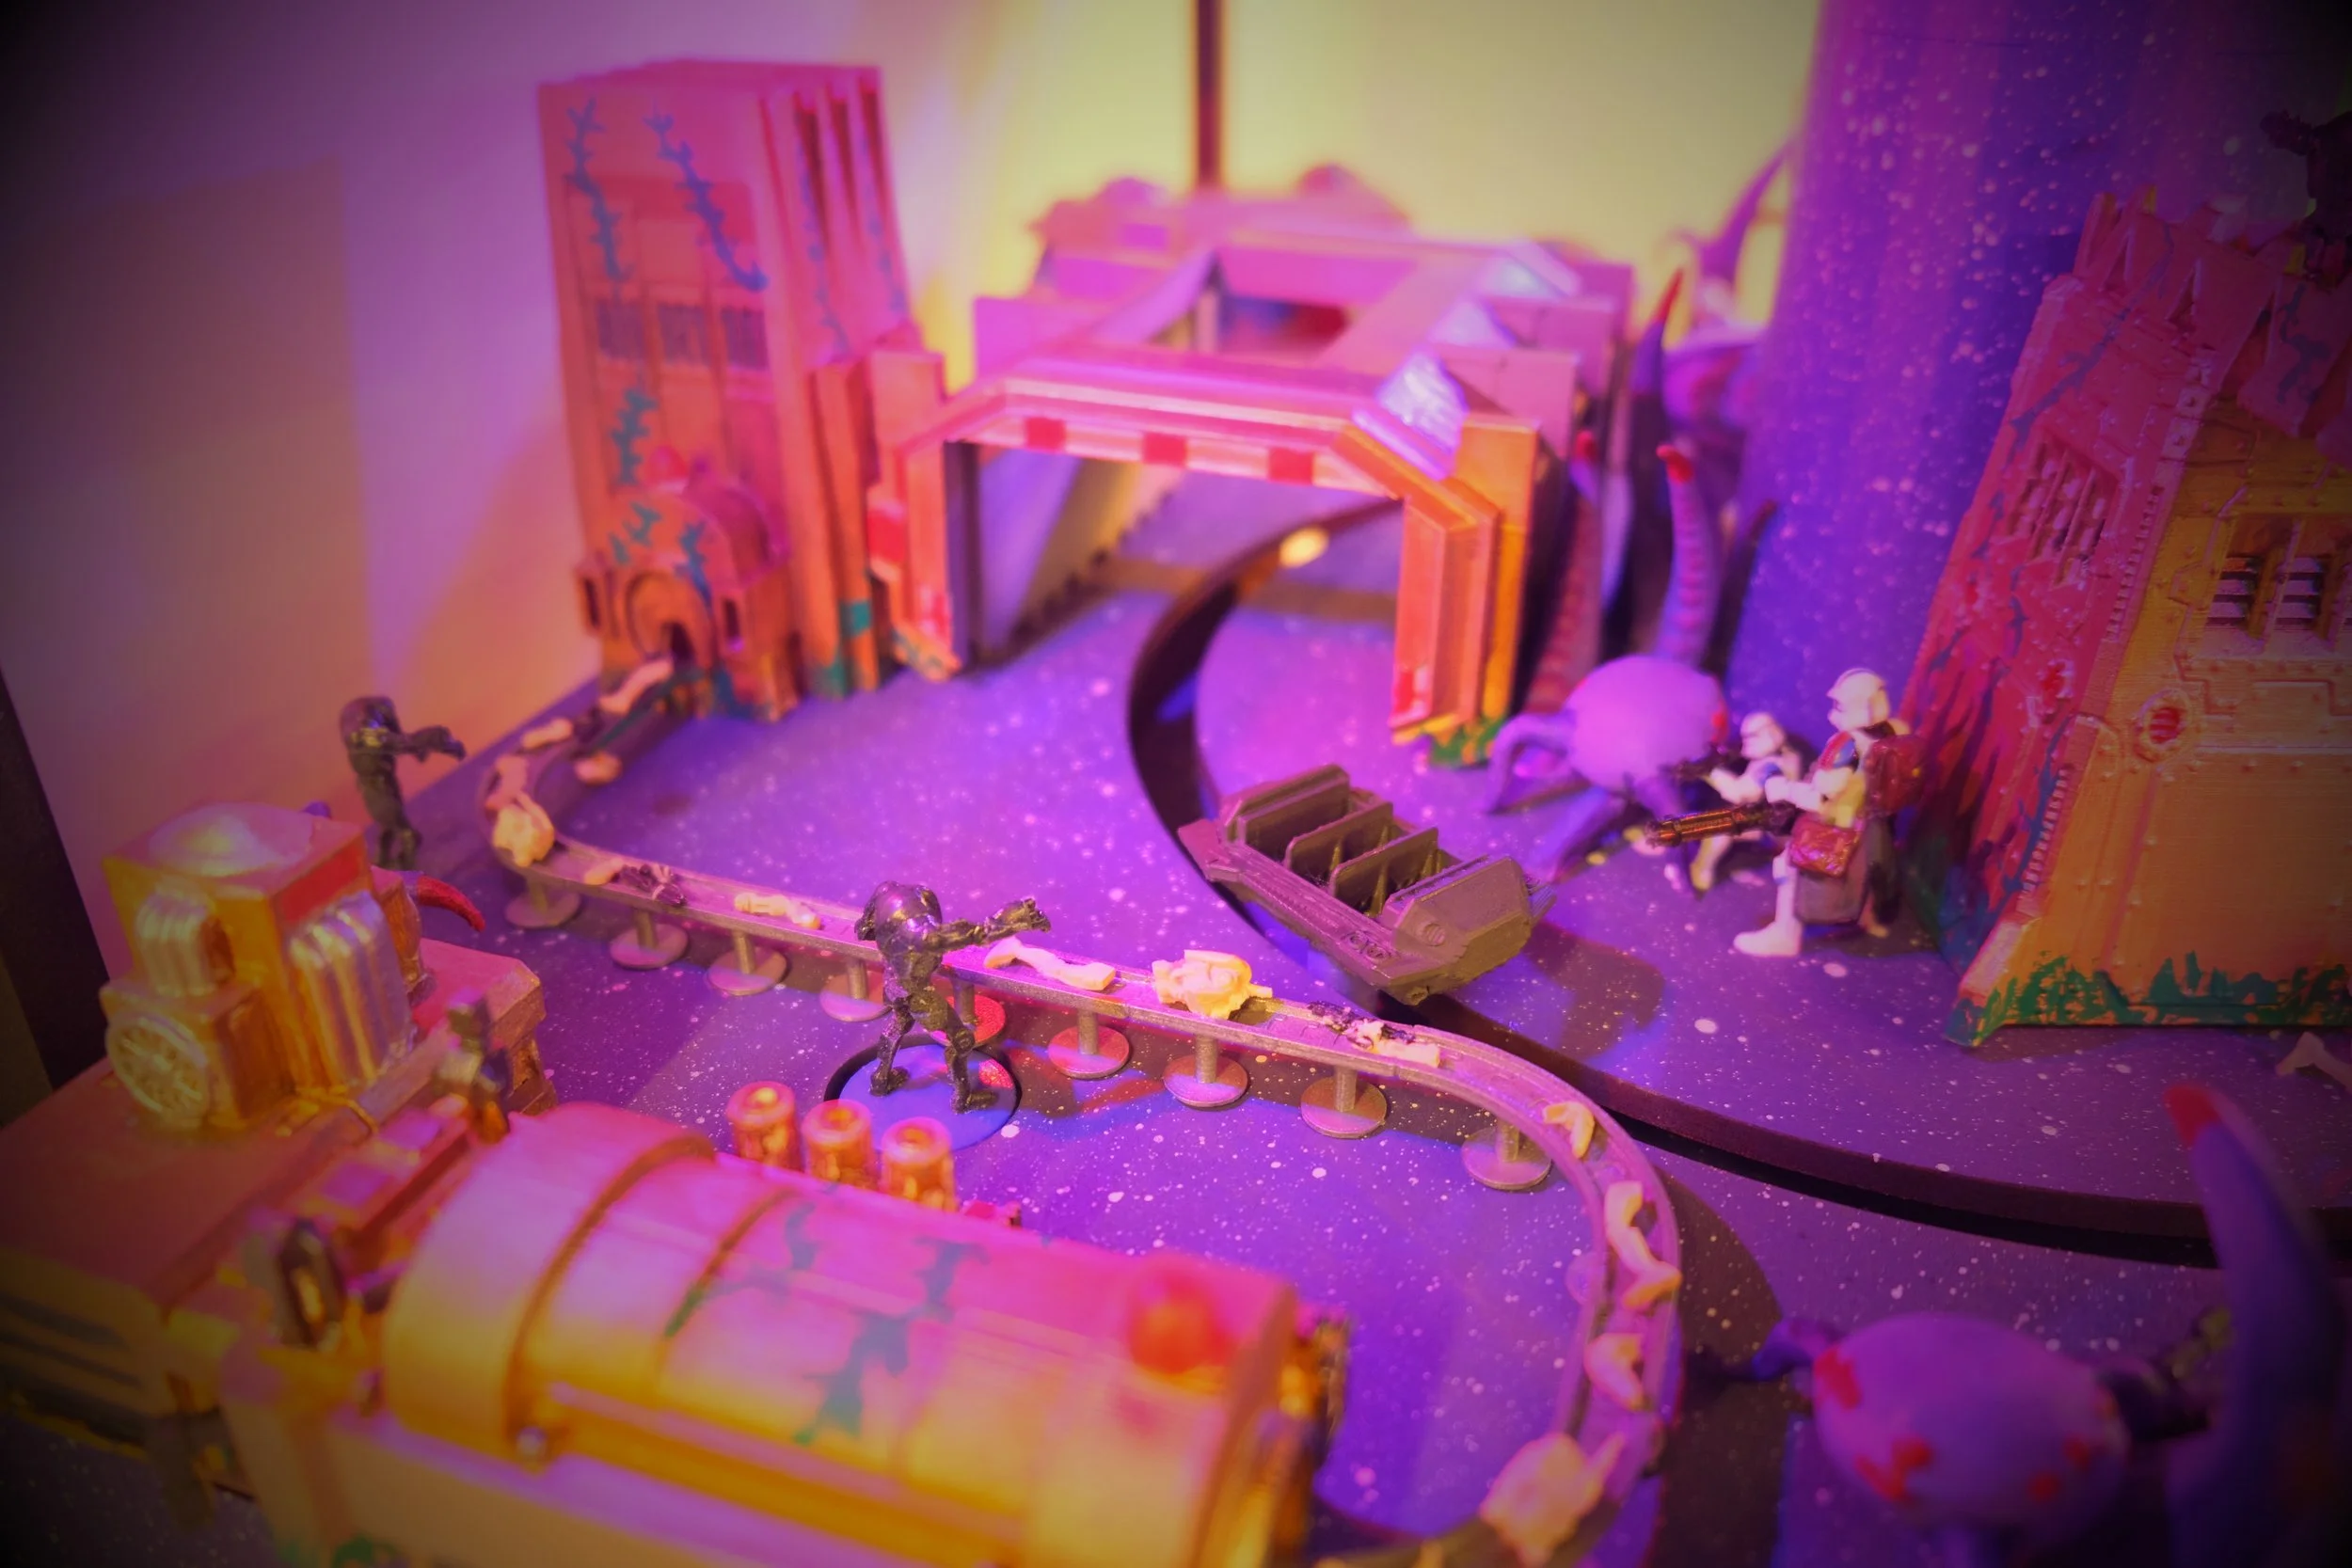
Once the droid patrol is cleared, you and the 501st push on through the jungle, finally breaking into a clearing where the factory looms ahead. Its industrial silhouette a stark contrast against Umbara's purple haze. Rex gives the order to move in, and together you breach the facility, fighting through the last of its droid defenses to set the charges and bring the entire operation crashing down behind you.
”In my book, experience outranks everything" - Captain Rex
This attraction runs on two interlocking systems: a mechanical drivetrain that physically powers the ride vehicle, and an electrical control layer that governs the timing of every show event. On the mechanical side, that means a stepper-driven turntable with a custom 10:1 gear reduction, servo-controlled figures, and parts fabricated across three different platforms, including Markforged, Formlabs, and Prusa. On the control side, an Arduino Opta PLC programmed in ladder logic (IEC 61131-3) reads a network of IR sensors to track vehicle position, paired with a custom KiCad-designed PCB for power and signal distribution, and a clear division of labor between deterministic PLC timing and microcontroller-driven motion. Every decision in both systems traces back to the same priorities, which are reliability, repeatability, and fault tolerance, the same standards that real ride systems are engineered to.
The Engineering
The Mechanical Systems
At the heart of the ride is a stepper-driven turntable. The main mechanical hurdle was resolution. As the turntable's radius increased, the motor's step size became visible as jagged motion at the outer edge, since the motor simply wasn't capable of stepping finely enough to keep things smooth at that scale.
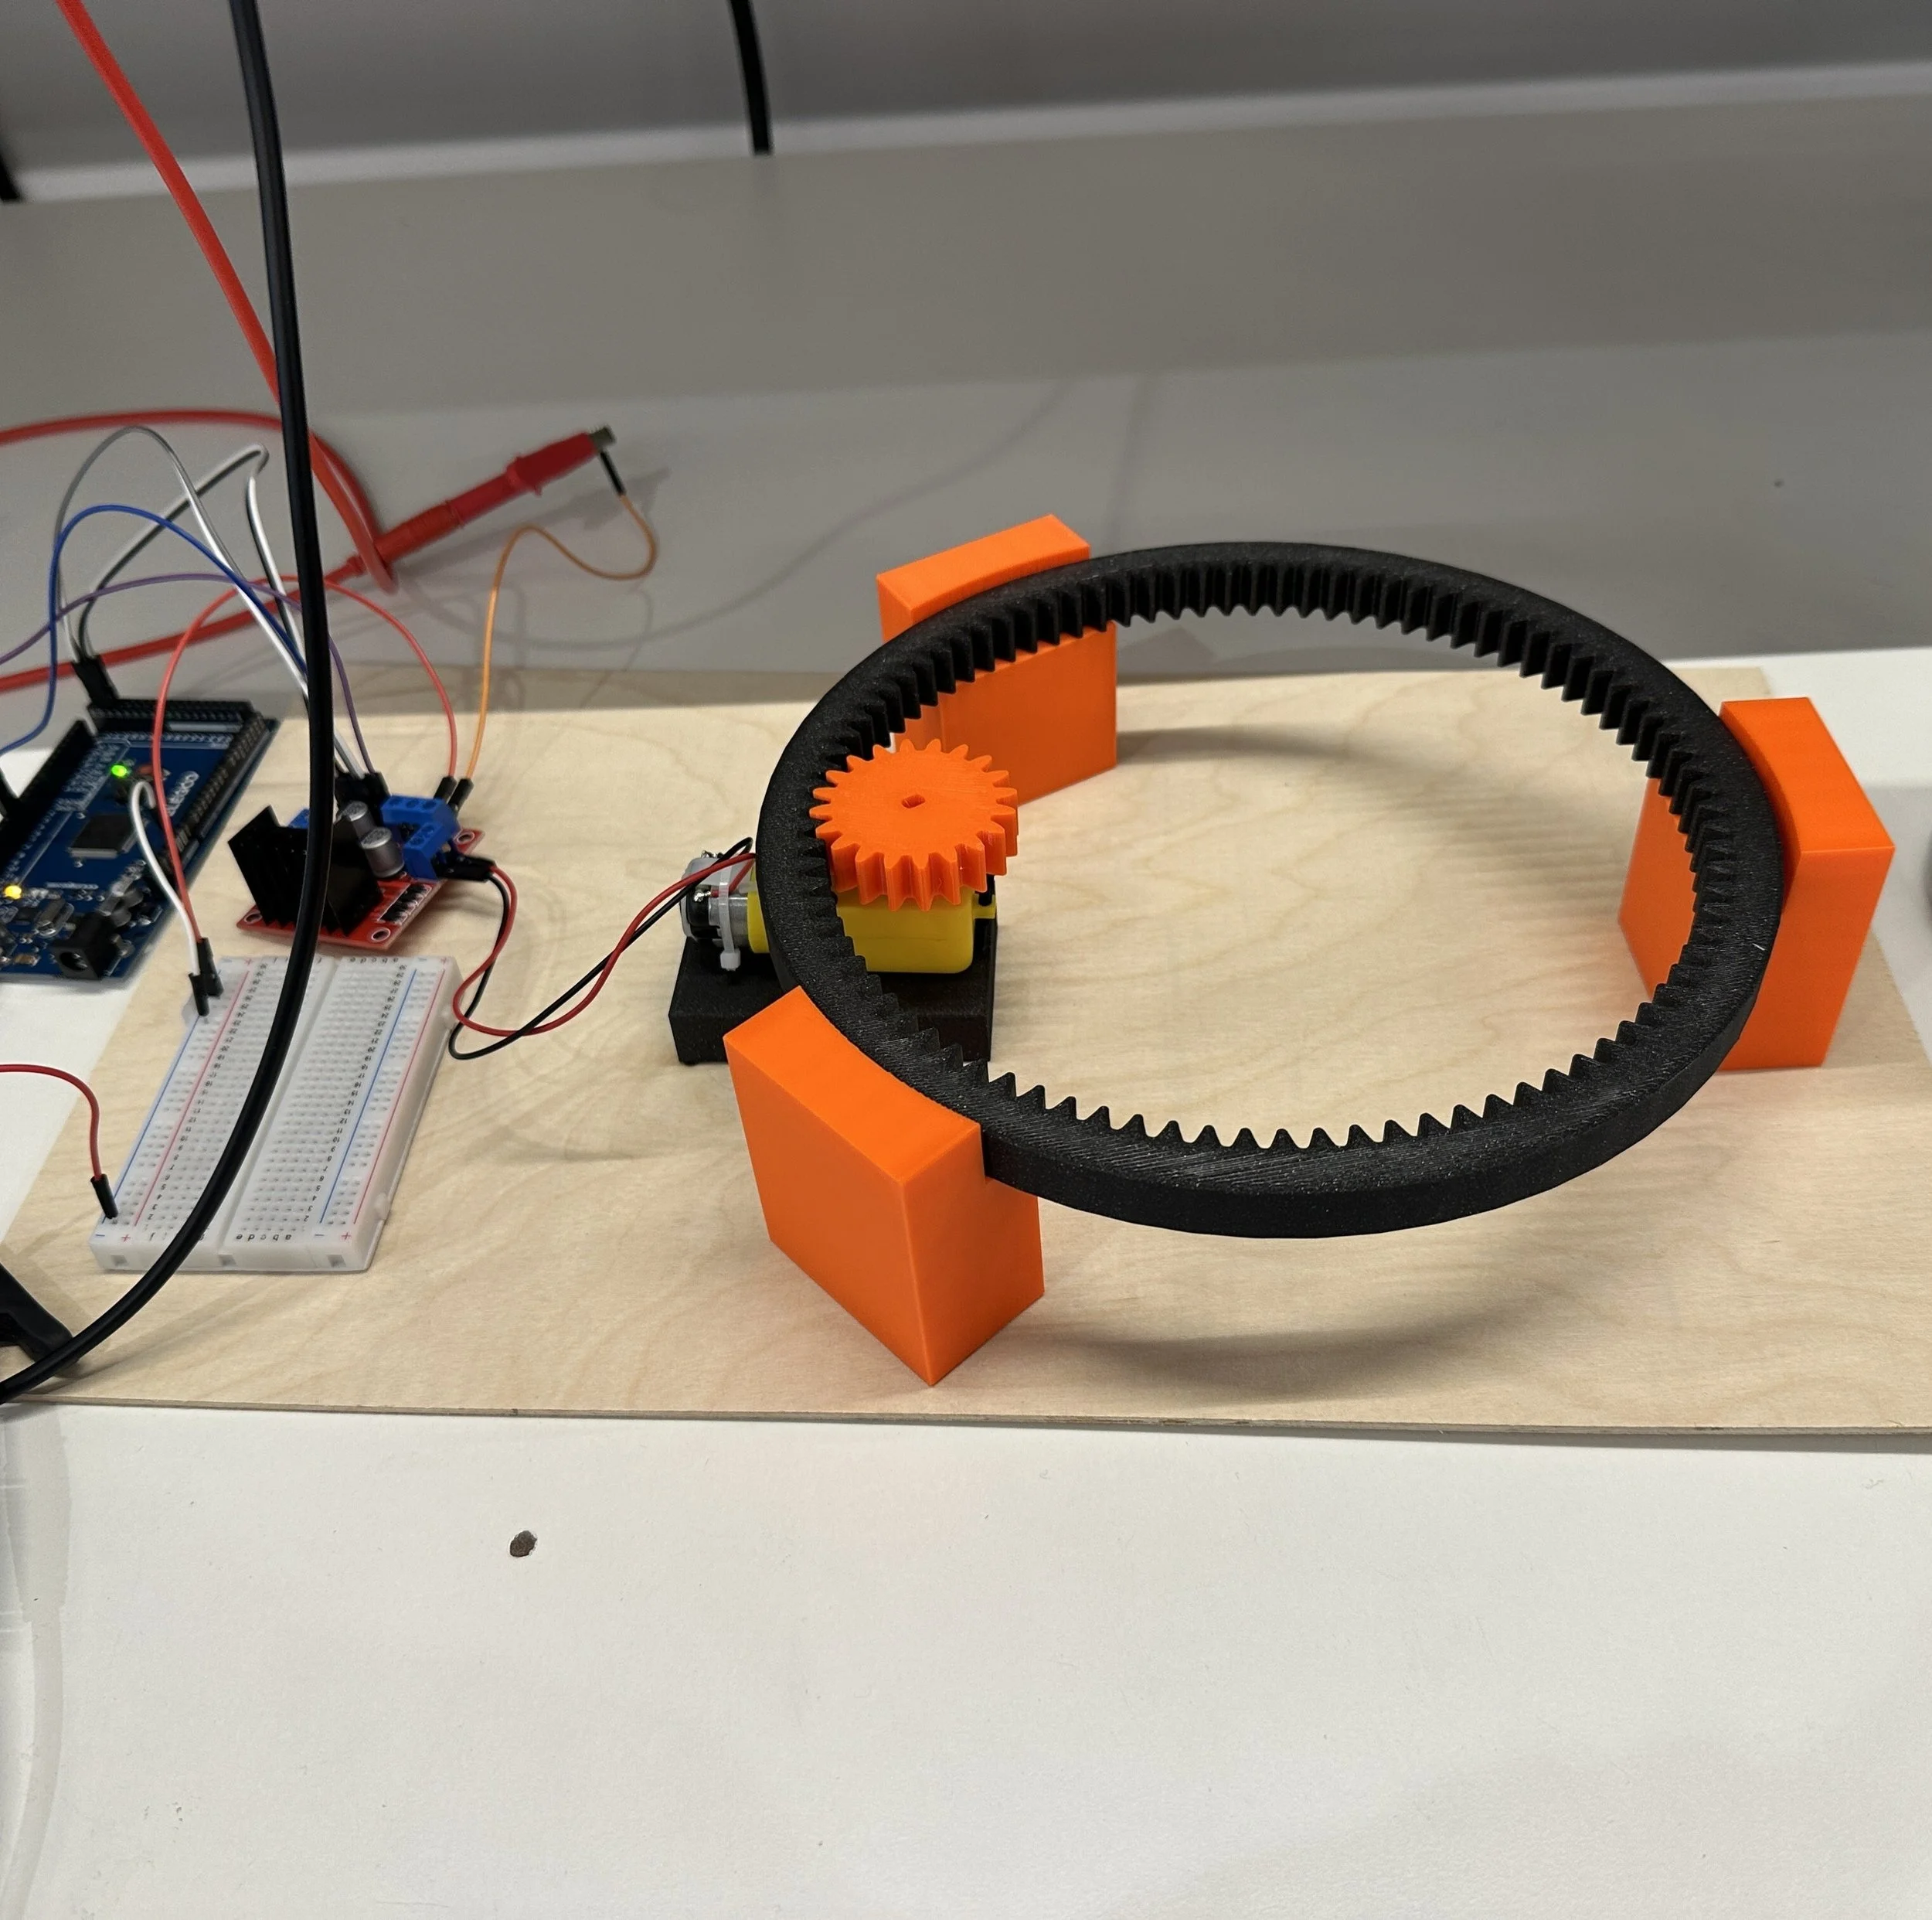
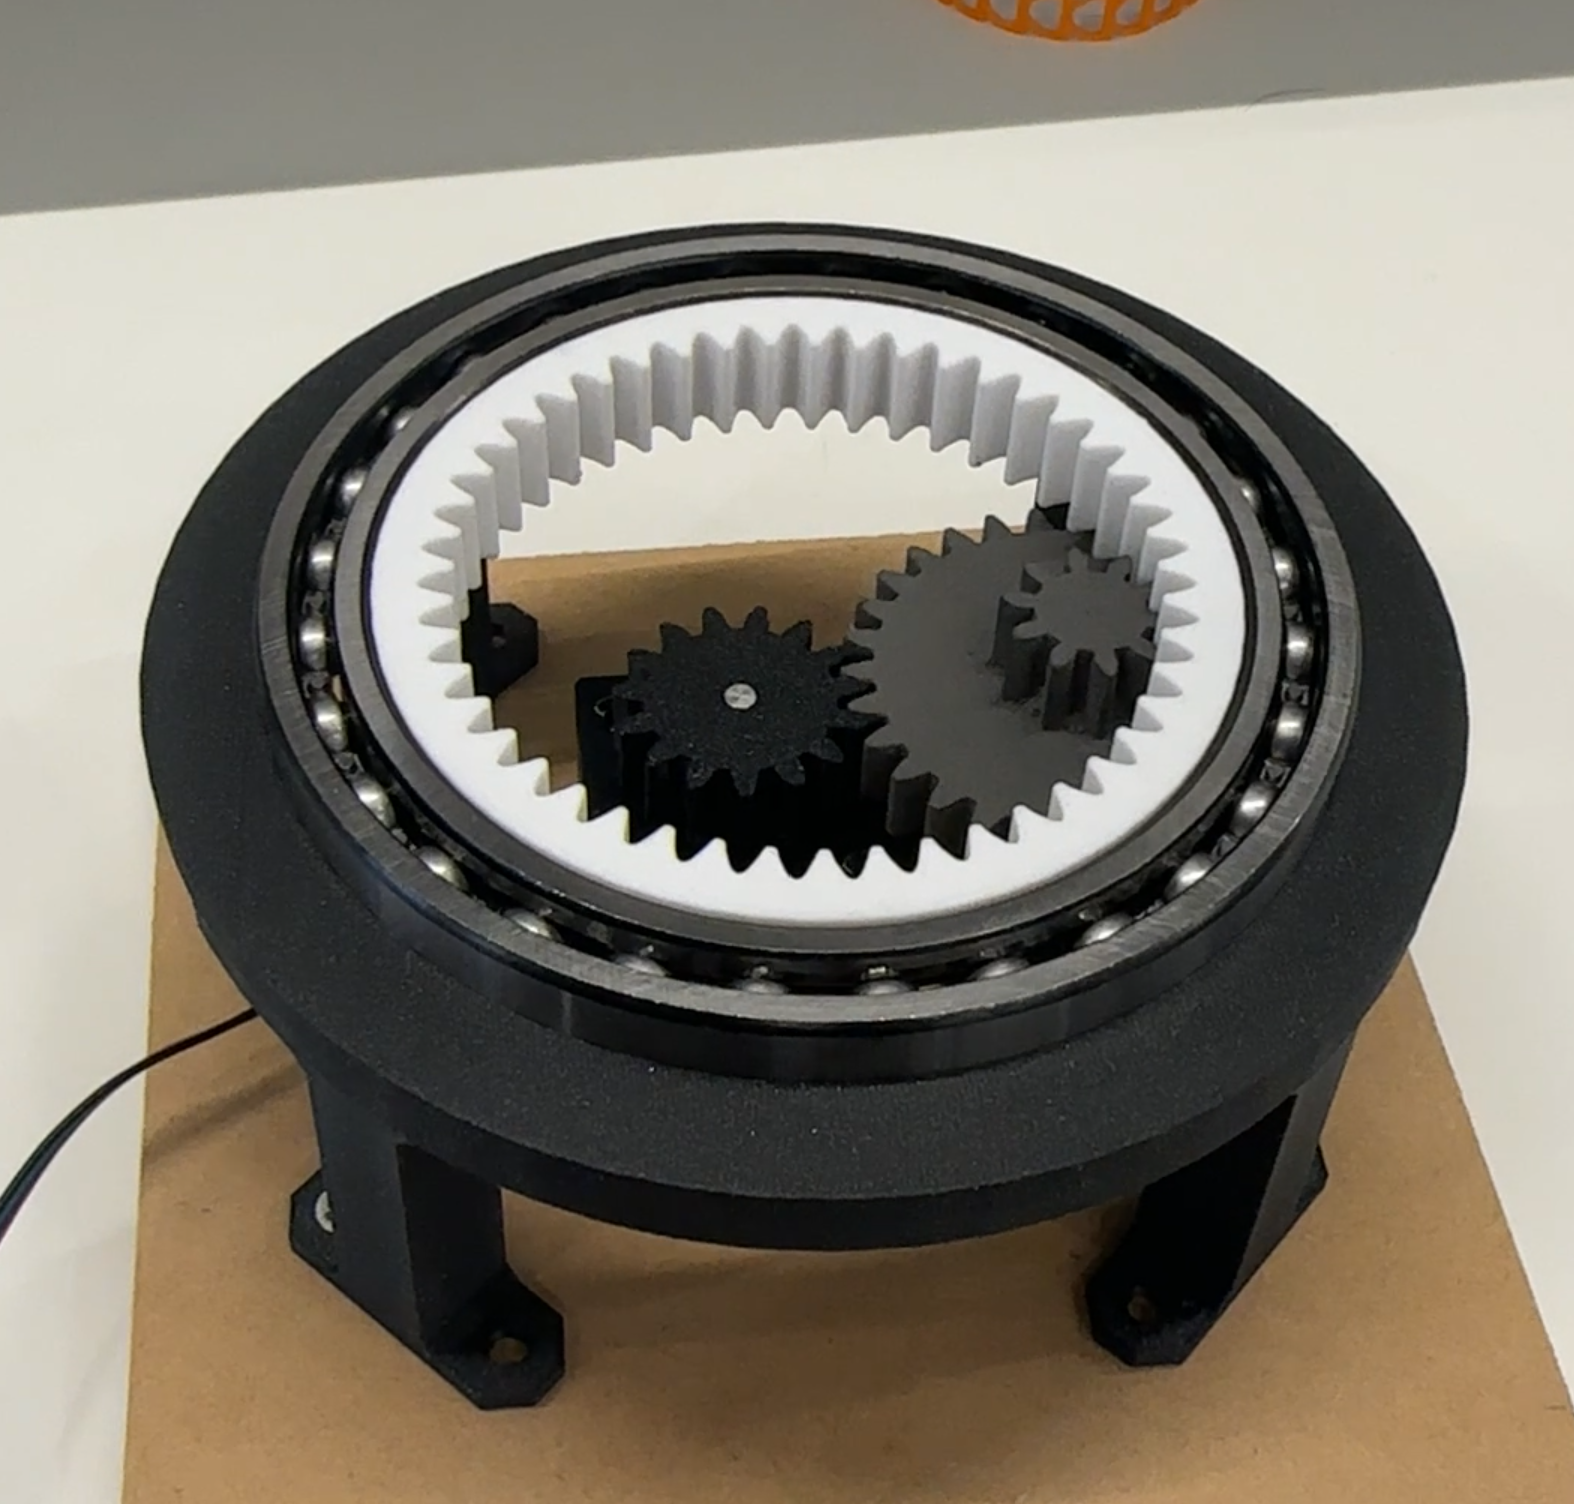
We solved it with a 10:1 gear reduction, meaning ten motor revolutions for every one turntable revolution. That accomplished two things simultaneously: it effectively increased the resolution of each motor step for smoother motion, and it brought the turntable's rotational speed into line with the show's timing requirements.
The gear train was modeled in SolidWorks and built using three different fabrication processes, each matched to the mechanical demands of that specific part:
The driving spur gear came off a Markforged X7 in a Nylon CF blend, chosen for its tensile strength and wear resistance under the motor's direct load.
The intermediate gear was printed on a Formlabs Fuse 1 using Nylon 12 GF powder at 100% infill, enough give to absorb motor shock, but rigid enough to keep transmitting torque cleanly. TPU 90A was tried first for its shock absorption, but it flexed too much to hold gear geometry under load.
The output gear (inner spur gear) was printed on a Prusa Core One+ in Prusament PETG. It mounts to a quarter-inch laser-cut wood disc that the ship sits on, shown here detached to make the mechanism underneath visible.
Ride Drivetrain
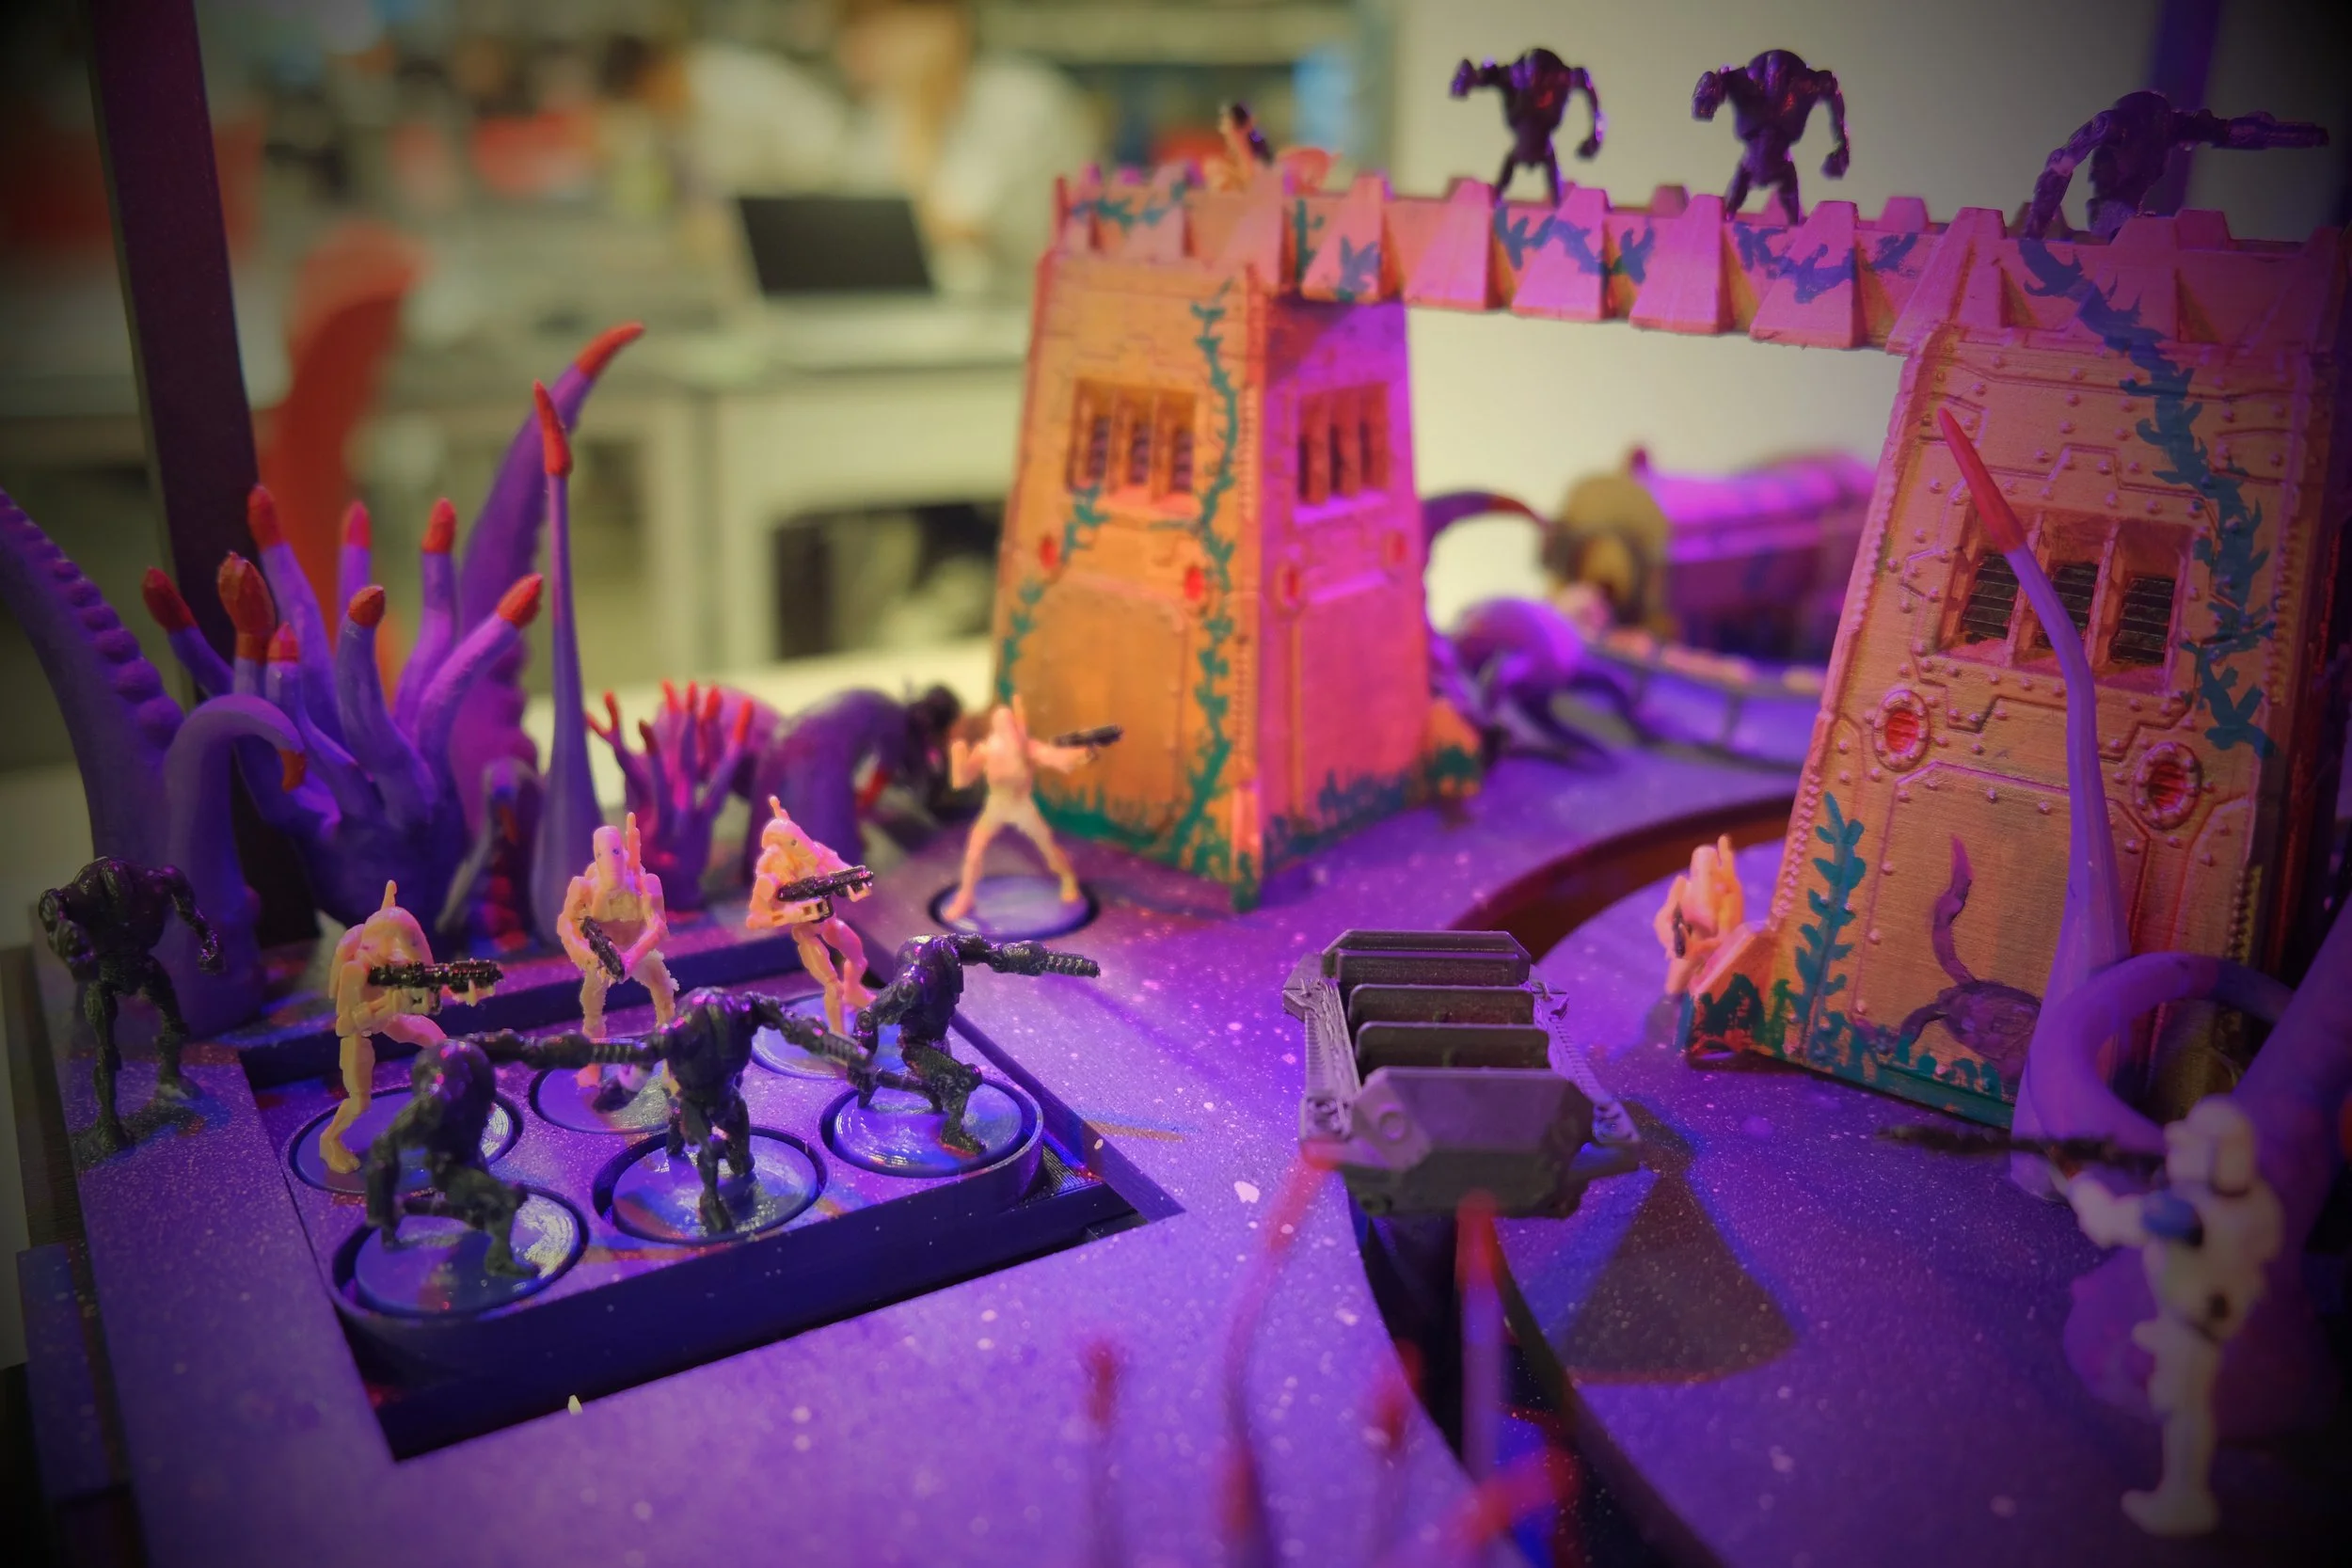
Each figure's motion is driven by its own dedicated servo, allowing fine control over individual timing and positioning within the show. The tan B1 battle droid closest to the overpass, for instance, runs off its own independent servo.
Figures that move together are handled differently. Instead of one servo per character, a single servo drives a rack-and-pinion mechanism with no gear reduction, turning one rotational input into shared linear motion so the entire group stays in sync off a single actuator. The cluster of six droids along the left edge of the frame, for example, all move from one shared rack-and-pinion servo.
Enclosure & Structure
The floor and bottom panels were laser-cut from designs sketched in AutoCAD. The ceiling, also drawn in AutoCAD, was cut on a handheld CNC instead, since the laser cutter's bed wasn't large enough. It needed to stay one continuous piece, since cutting it into sections would have required internal supports that would have eaten into both the story space and the ride path.
Character Actuation
Position Sensing & Architecture
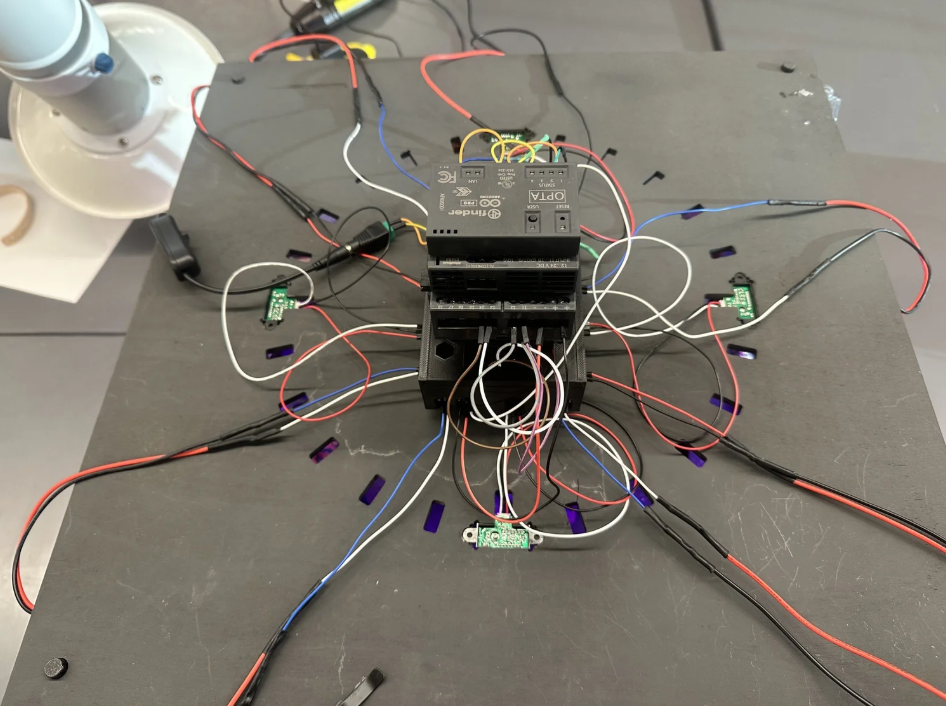
The entire attraction is controlled by an Arduino Opta PLC, programmed in ladder logic to IEC 61131-3. The Opta was a deliberate pick: an industrial-grade PLC offering the deterministic timing and operational reliability the ride needed, while still being practical to program and wire into the rest of the system.
The stepper motor driving the turntable could, in theory, track its own position by counting steps, but that approach is open-loop. Under load, steppers can overstep, understep, or skip steps with no way to detect it. Leaning on step counting for vehicle position would have meant showing cues drifting out of sync at best, and ride failures at worst. Instead, IR sensors mounted in the ceiling continuously monitor each zone of the ride and display elements only when the vehicle is confirmed to be present beneath that sensor. That feedback loop keeps showing the timing is accurate, whether the vehicle is moving fast, slow, or stopped.
The control system deliberately splits its workload. The PLC handles everything time-critical, from reading sensors and evaluating thresholds to triggering zones, all running deterministically through ladder logic. A microcontroller mounted in the floor handles the servo motion commands themselves, which take more computation but don't need hard real-time precision once the PLC has already decided the moment to fire. Timing lives on the deterministic hardware; motion lives on the dedicated hardware.
The Electrical & Control Systems
Signal Chain
The system also keeps its analog signal path as short as possible by design. Running the IR sensors' raw analog output from the ceiling all the way down to the floor-mounted microcontroller would have exposed those weak signals to interference from the stepper drive, servo PWM lines, and lighting circuits running through the structure. Instead, the analog signal is processed at the PLC, right next to the sensors, and only a clean 5V digital signal travels down to the microcontroller, far less susceptible to noise over a longer run than a millivolt-level analog signal would be.
How each zone works:
IR sensors in the ceiling continuously watch for the ride vehicle and send an analog reading to the PLC.
The PLC checks that reading against a threshold set in the ladder logic and triggers the zone once it's crossed.
When triggered, the PLC closes a relay output, sending a 5V logic-high signal to the floor-mounted microcontroller. That relay also electrically isolates the PLC's output from the microcontroller's input, so any noise or faults on the control side stay contained there.
The microcontroller then drives that zone's servos to their target positions, while the PLC keeps full control over sensing and timing.
Power & PCB
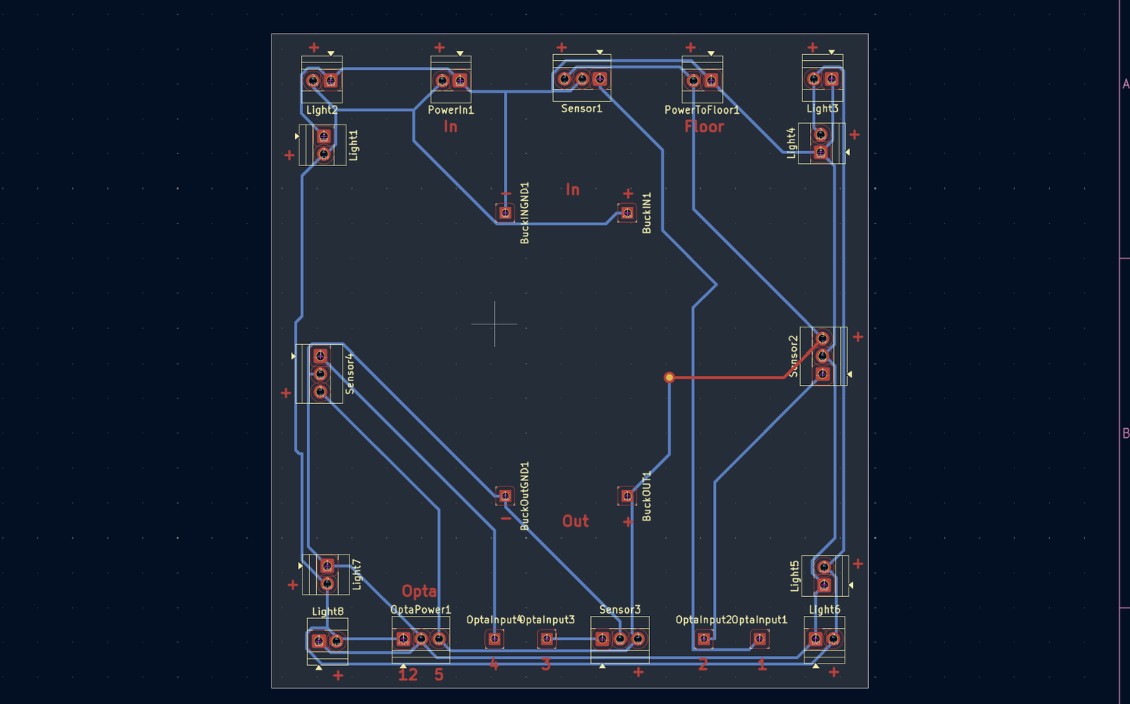
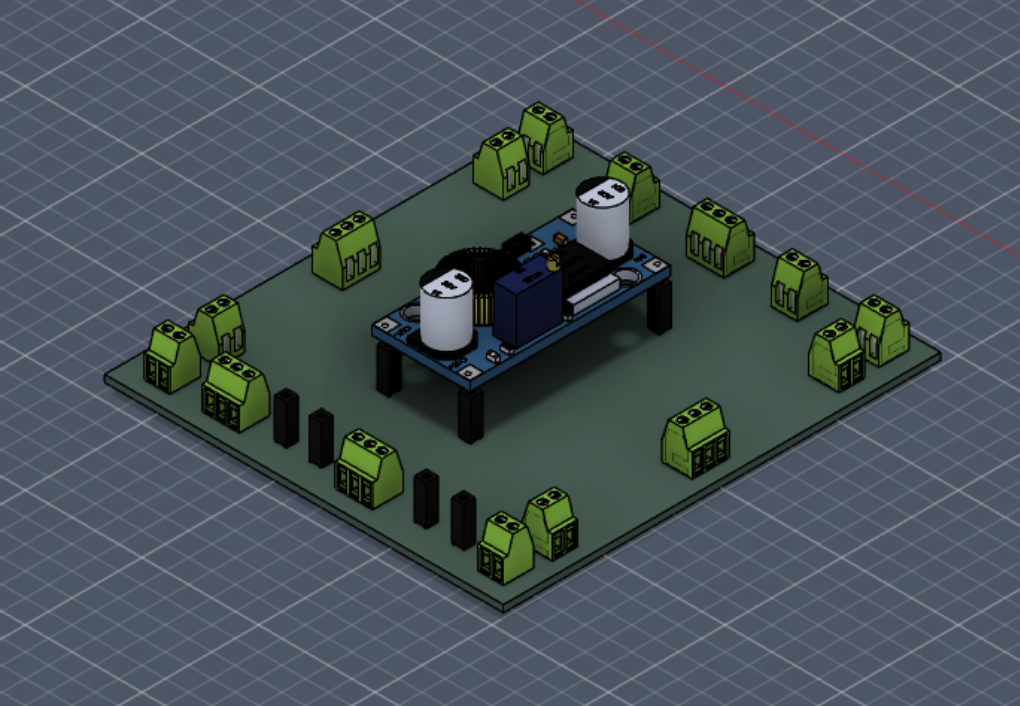
A custom PCB, designed in KiCad, handles signal routing and power distribution for the lighting, microcontroller, and PLC, and was fabricated in-house on an LPKF S104 ProtoMat.
12V comes in directly to power the PLC and lighting.
A buck converter steps that 12V down to 5V to run the microcontroller, sensors, and the relay return path.
A separate 6V supply powers the stepper motor and servos, since they draw higher current and benefit from isolation from the logic rail.
Screw terminals are used throughout the build to keep connections from working loose during normal ride operation.
Set and Show Design
Umbara was the obvious choice for this build. Few planets in Star Wars carry as much built-in visual identity as it does, with its perpetual twilight, glowing alien foliage, and an almost monochrome color palette that does a lot of heavy lifting for an attraction at this scale. The dark, saturated environment also serves a practical purpose. It makes the lighting cues and the characters stand out clearly against the backdrop instead of getting lost in it. To keep the world consistent with canon, every visual choice was checked against the Umbara arc in Star Wars: The Clone Wars (Season 4, Episodes 7-10).
Set Design
World-Building
A saturated purple wash covers the ground and the tendril-like foliage throughout the set, with a speckled white overlay on the floor meant to read as distant stars or drifting particulate.
Red and purple overhead fixtures cast a constant glow across the scene, recreating Umbara's signature twilight. These lights run continuously instead of firing on a show cue, so the environment reads as Umbara the moment a guest sees it, before any animation even starts.
The foliage pods are finished in a UV-reactive red pigment and lit by a black light trained on one section of the ride. It's a simple way to fake Umbaran bioluminescence without running power to every individual plant, and it also gives guests a clear visual anchor as the turntable carries them past it.
Narrative Staging
The scene opens at a Republic outpost, with a parked gunship and Anakin and a squad of troopers arranged in formation, so guests start out in familiar, friendly territory before the ride pulls them into contested ground.
The droid factory is built in golds, browns, and tans, a palette chosen specifically to clash with the surrounding purple environment, so it reads instantly as foreign industrial infrastructure dropped into the jungle.
A conveyor belt inside the factory holds droid parts in a fixed, stationary arrangement. Rather than using a motor to animate it, the implied motion alone tells guests exactly what kind of operation they're there to shut down.
Fabrication
All terrain and structural pieces were FDM-printed in PLA on the Prusa Core One and Core One+ using unpigmented filament, then sanded, primed, and painted by hand.
The foliage followed the same FDM and PLA process. The J850 didn't have a UV-reactive resin option, so the bioluminescent effect was instead achieved with neutral PLA finished with hand-applied UV-reactive paint on each pod.
The Republic gunship was broken into sections and printed on the Stratasys J850, then assembled, a choice driven by wanting the J850's smoother surface finish on the vehicle's exterior panels.
The droid factory, on the other hand, was printed as a single uninterrupted piece on the Prusa Core One L. Its larger build volume meant the entire structure could come off the print bed in one shot, with no seams or post-print assembly required.
Every scenic piece that came off a printer went through a full sanding pass to knock down layer lines, followed by a primer coat and final paint. Multi-color resin printing was an option for some of this work, but it wasn't a good fit for the sheer amount of scenic material the build called for. FDM printing followed by hand finishing simply scaled better.
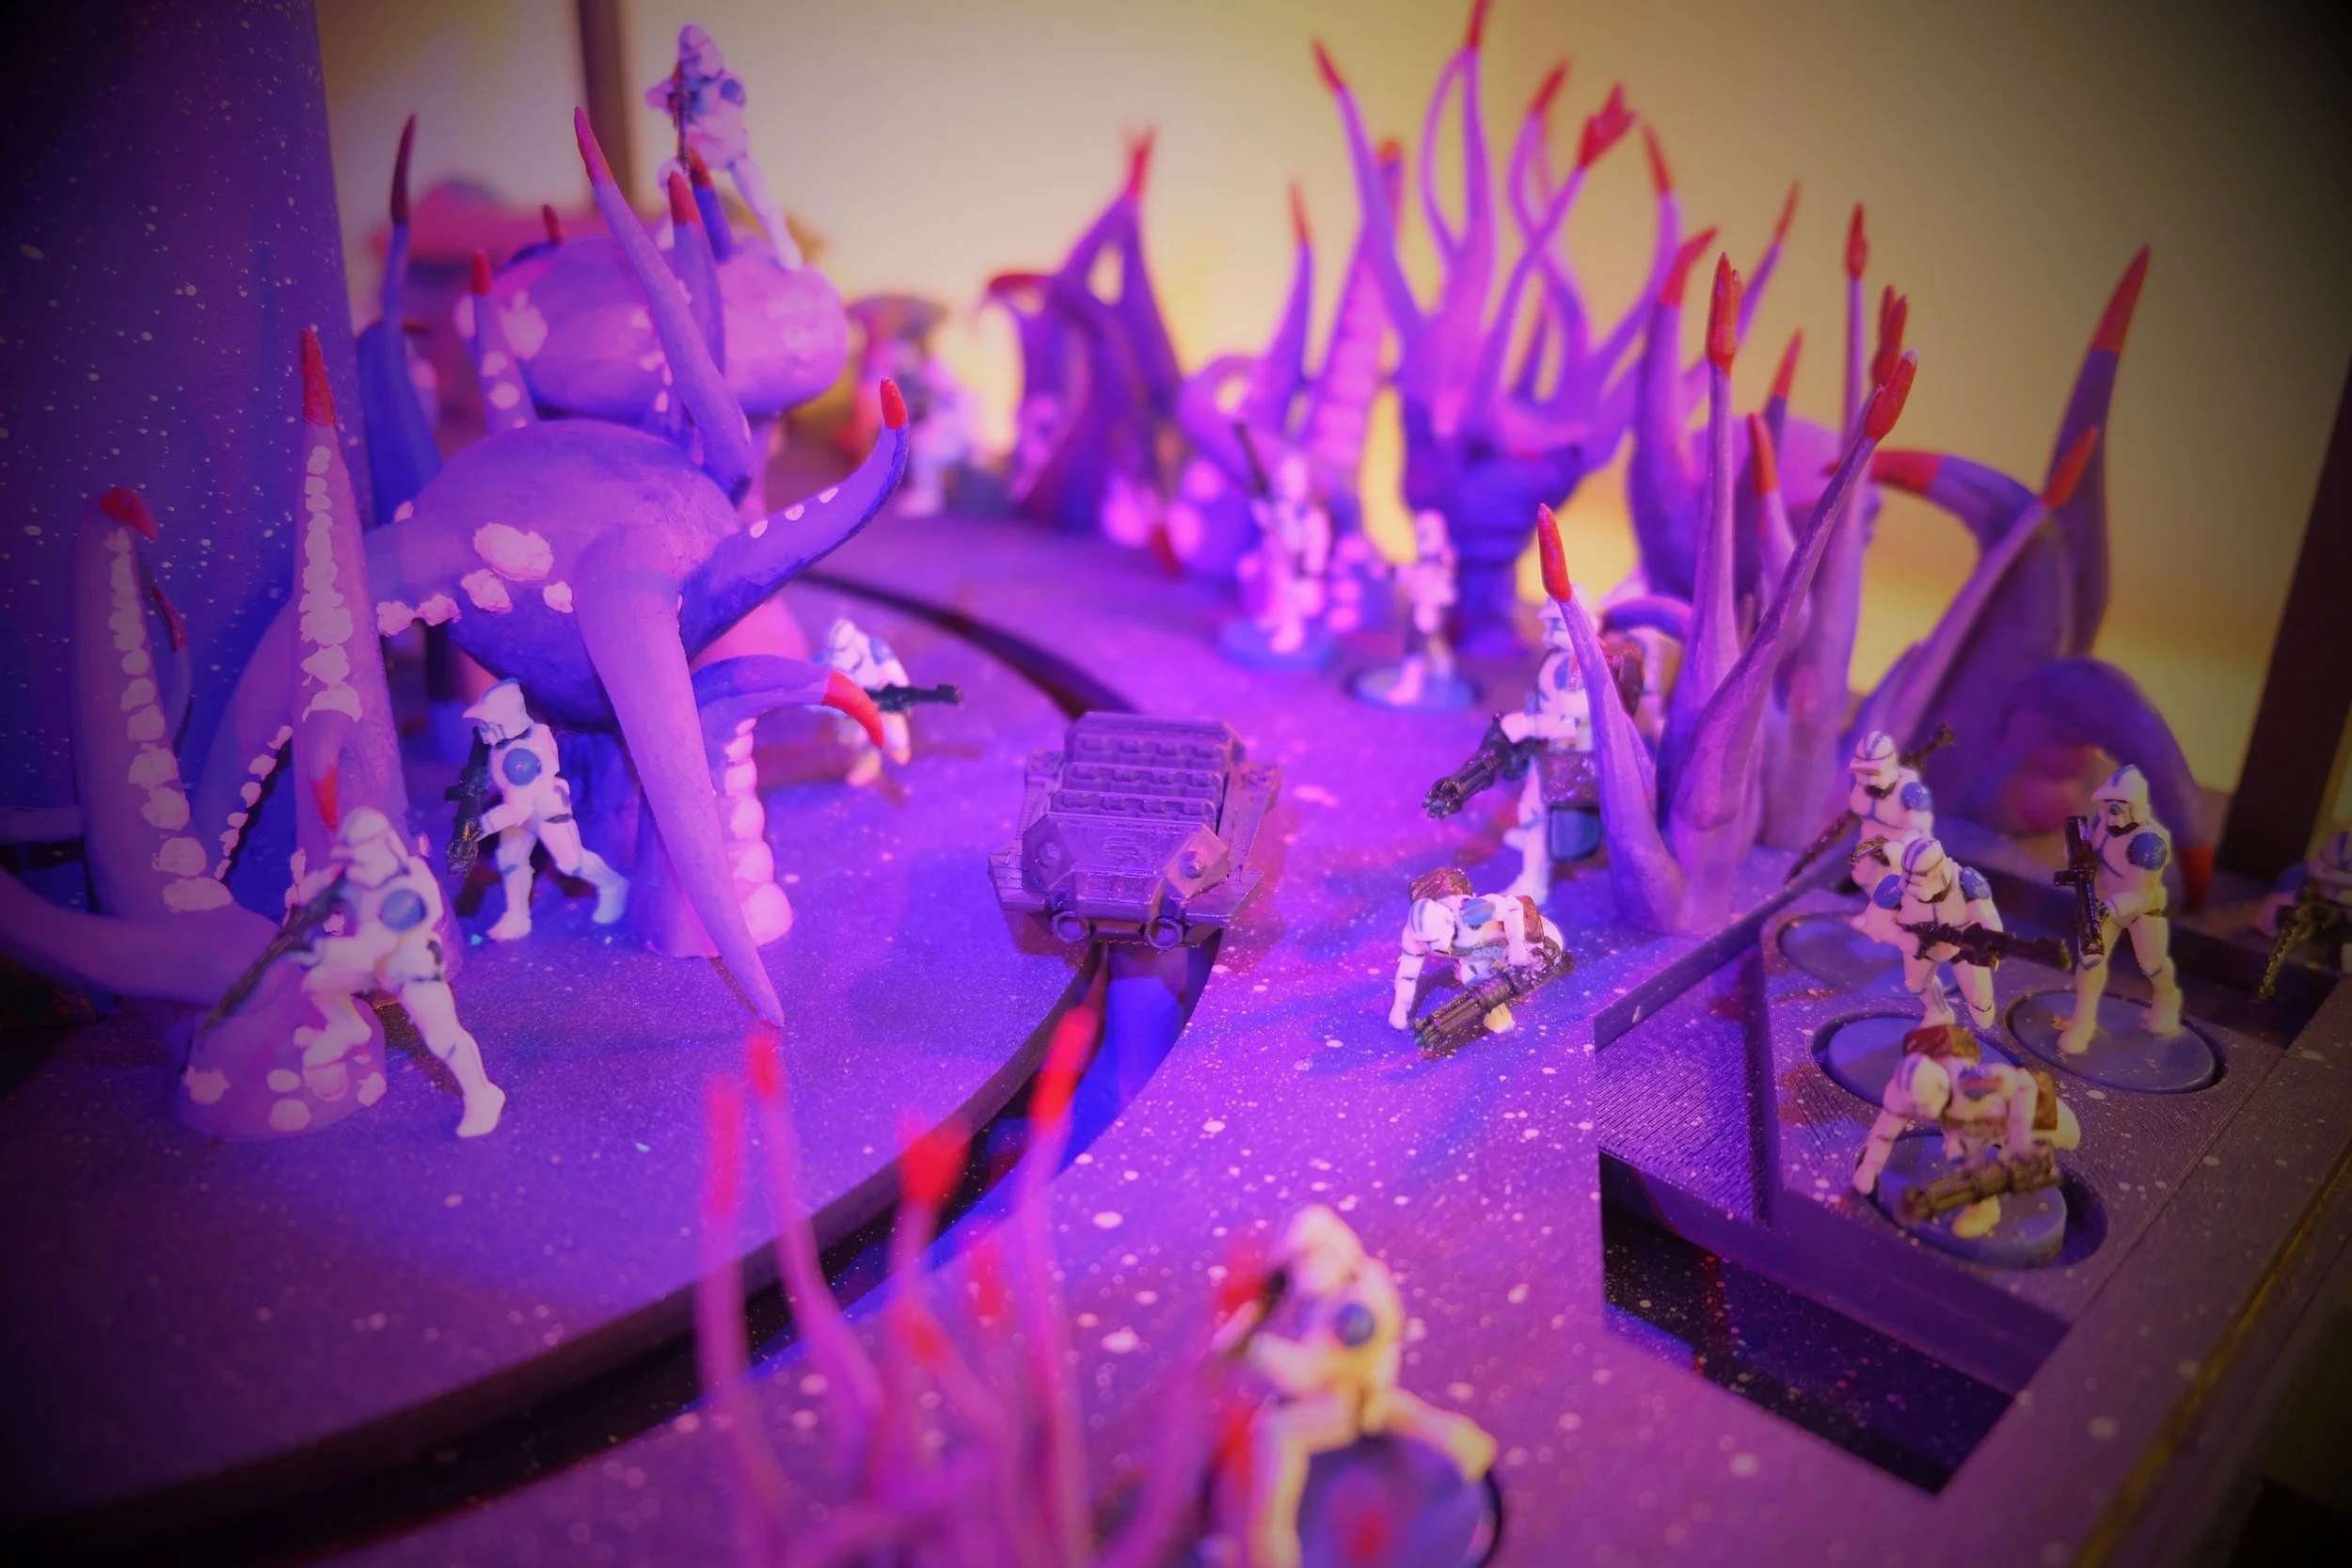
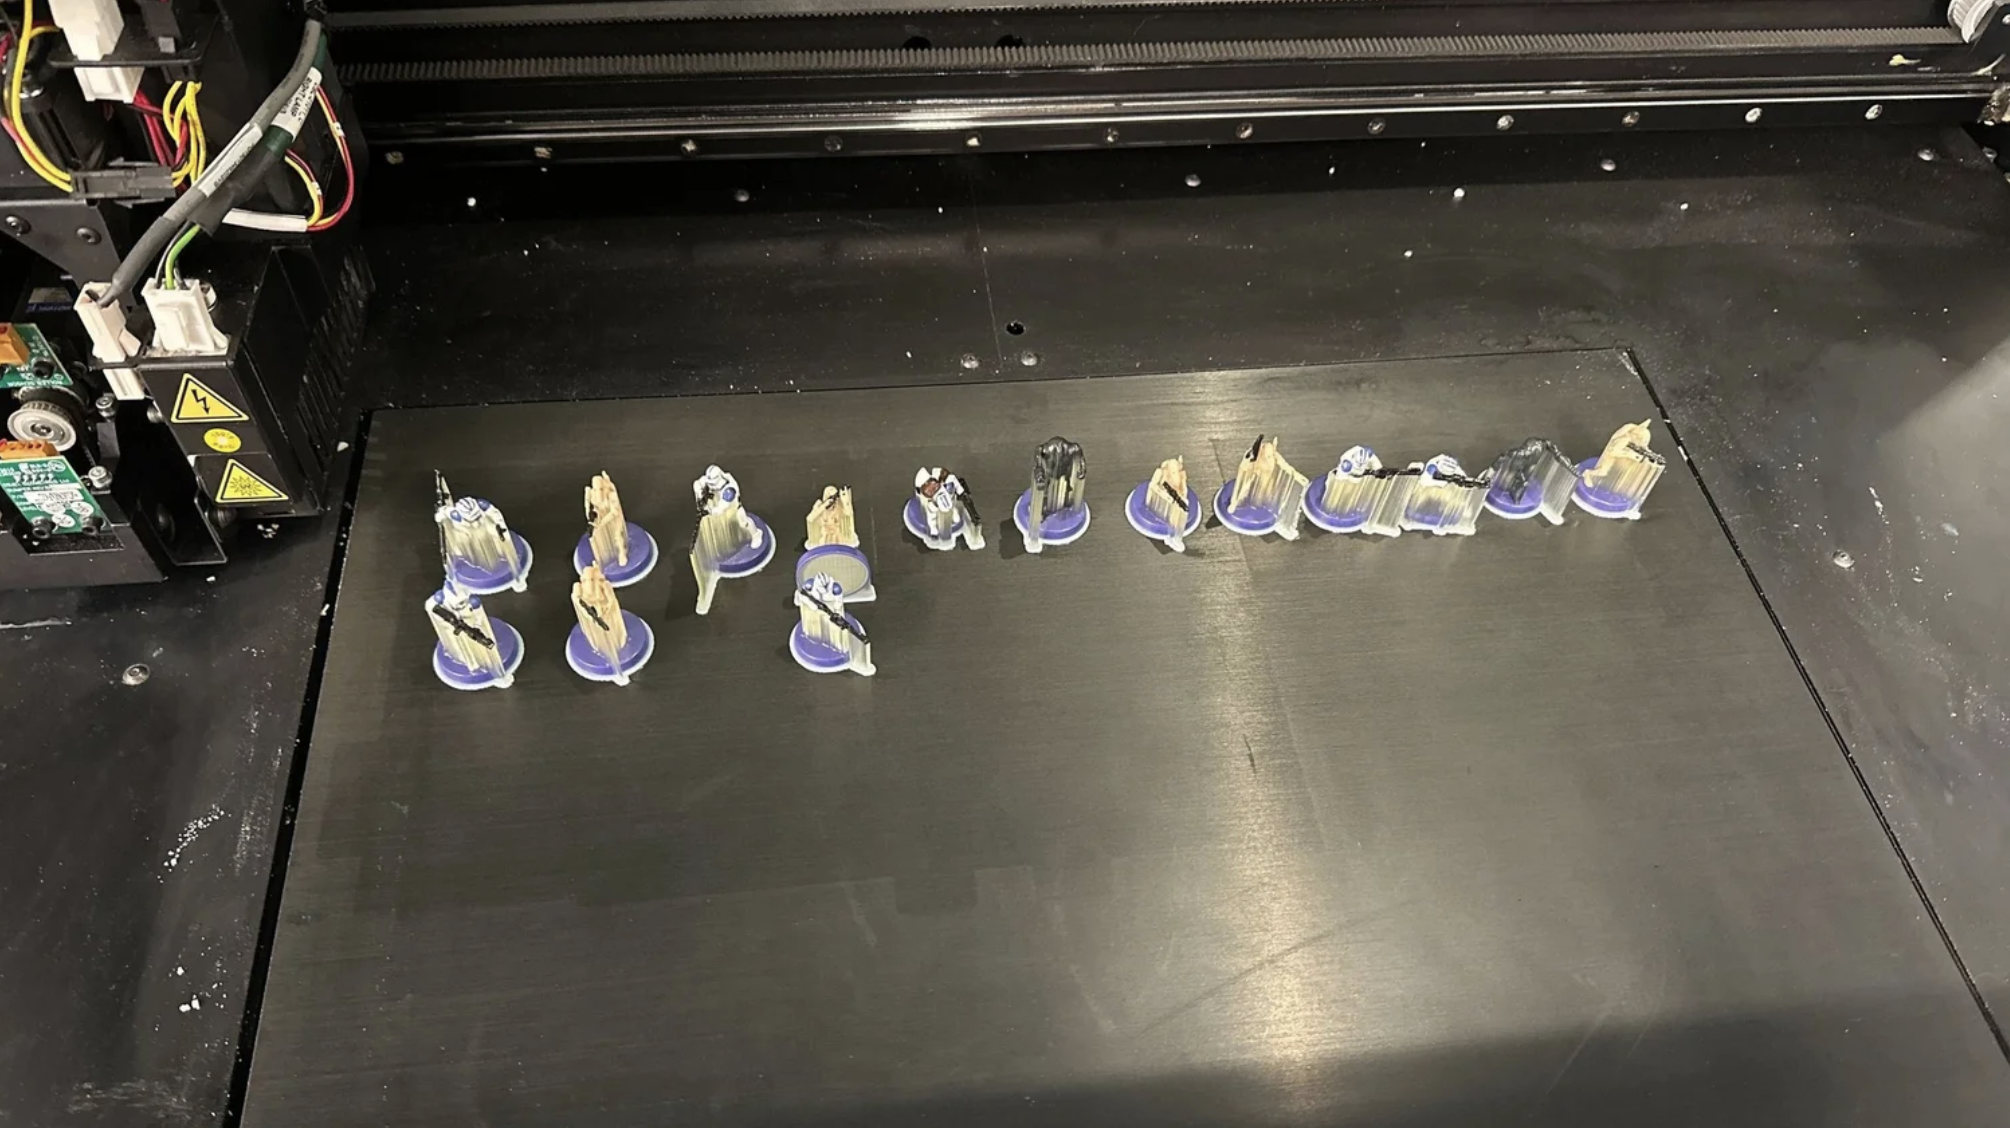
Every figure in the attraction was produced on a Stratasys J850, a PolyJet printer capable of printing multiple resin colors in a single pass. With more than forty characters needed at a 1:48 scale, hand-painting each one wasn't realistic. It would have taken weeks and produced an inconsistent-looking roster. The J850 solved that problem directly, while the larger scenic elements were better served by the FDM and hand finishing approach used elsewhere in the build. Two different problems, two different tools.
To keep every figure accurate to the source material, character models were pulled from Galactic Armory's catalog of Star Wars 3D assets rather than modeled from scratch, freeing up time to focus on the engineering systems. Color work was done directly on the model files using Microsoft 3D Paint, which proved more than sufficient for vertex-level coloring at this scale and did not require a more complex tool before sending the files to the J850.
Roster
Anakin Skywalker and a contingent of clone troopers appear throughout the attraction.
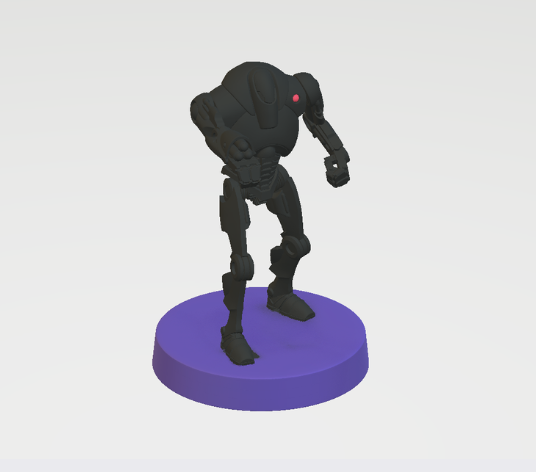
B1 Battle Droids and Super Battle Droids populate both the ambush scene and the factory zones.
Print Workflow
Figures were sourced from Galactic Armory, with the standard circular display base stripped off most models so they'd sit naturally into the terrain instead of floating on a pedestal.
Color was applied straight to the model files in Microsoft 3D Paint before export to the J850.
The target scale for all characters was roughly 1:48, though exporting from Microsoft 3D Paint introduced some inconsistency in sizing, so each figure was checked and adjusted individually to land close to that target while preserving detail at print resolution.
Post-processing was minimal. Support material was removed in the J850's lye bath, and no sanding, sealing, or topcoat was needed since the multi-color resin finish comes out print-ready.
The Characters
Additional Photos and Videos
-
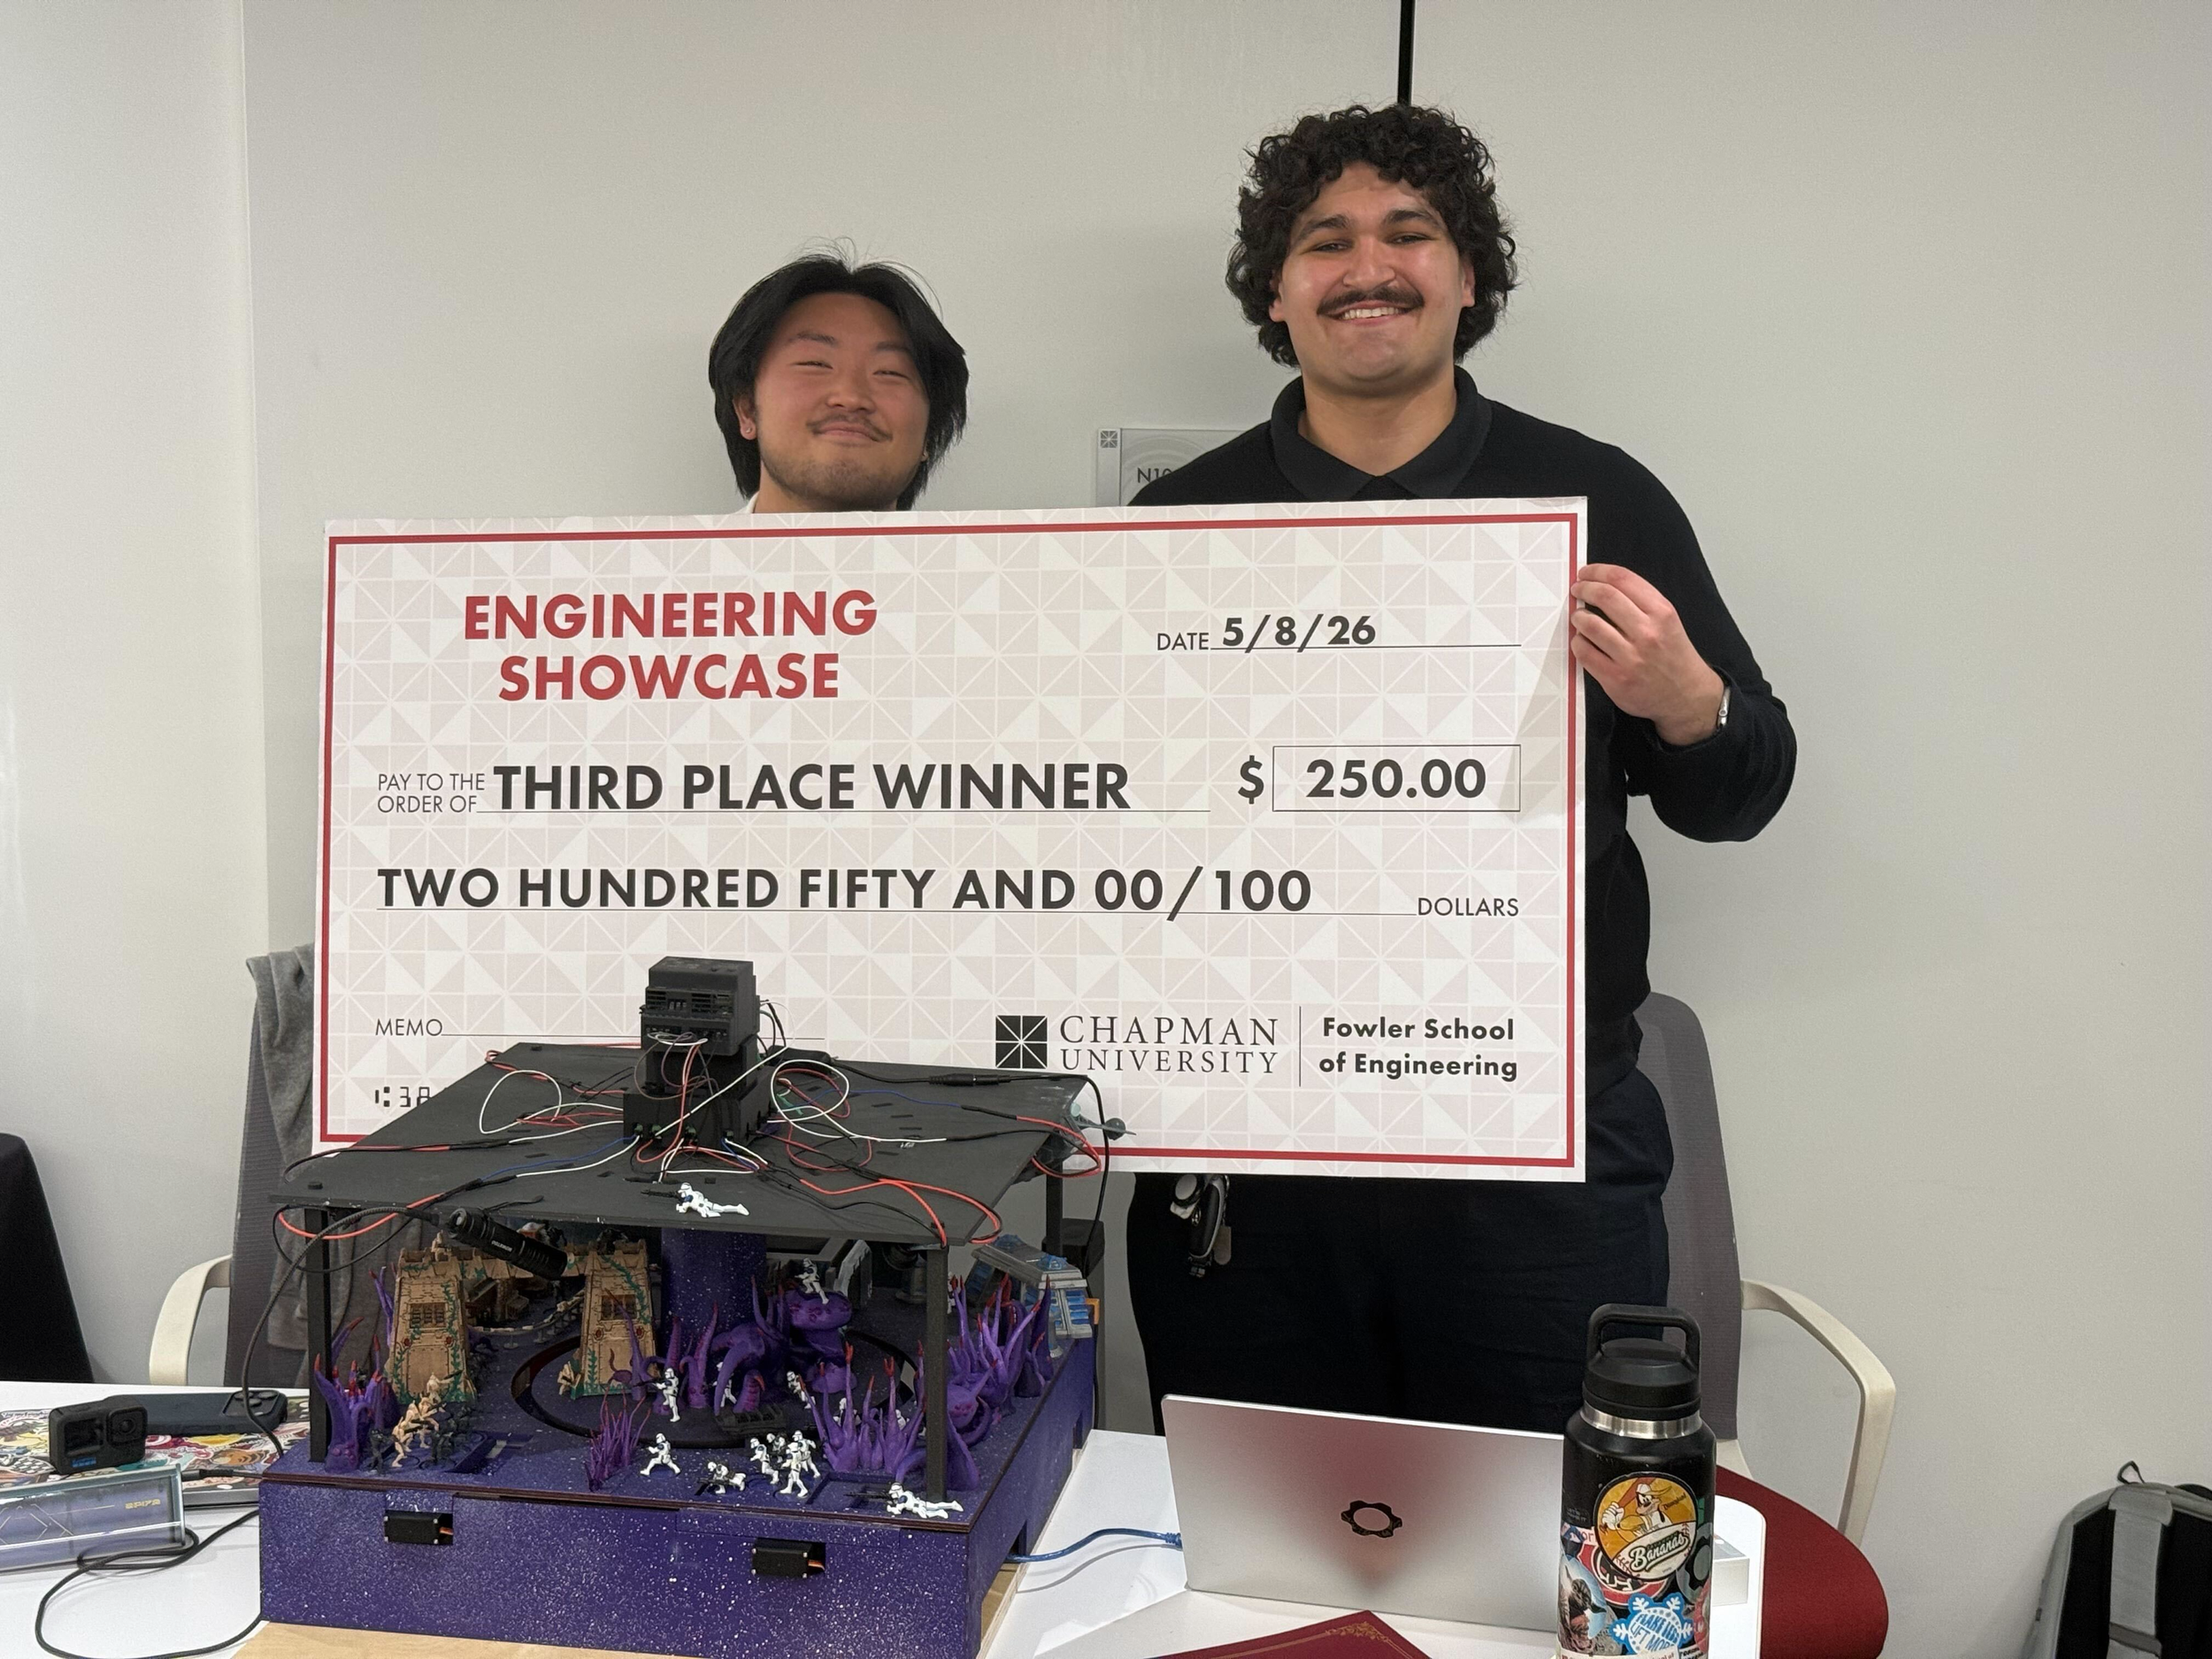
![Two men standing behind a table with a large sign that says 'Engineering Showcase' and an award amount of $250.00. The table has a purple display with small robotic figures and electronic components. The man on the right has curly hair and is smiling, while the man on the left has straight hair and is smiling with his eyes closed.]()
Third Place at the Chapman Engineering Showcase
-
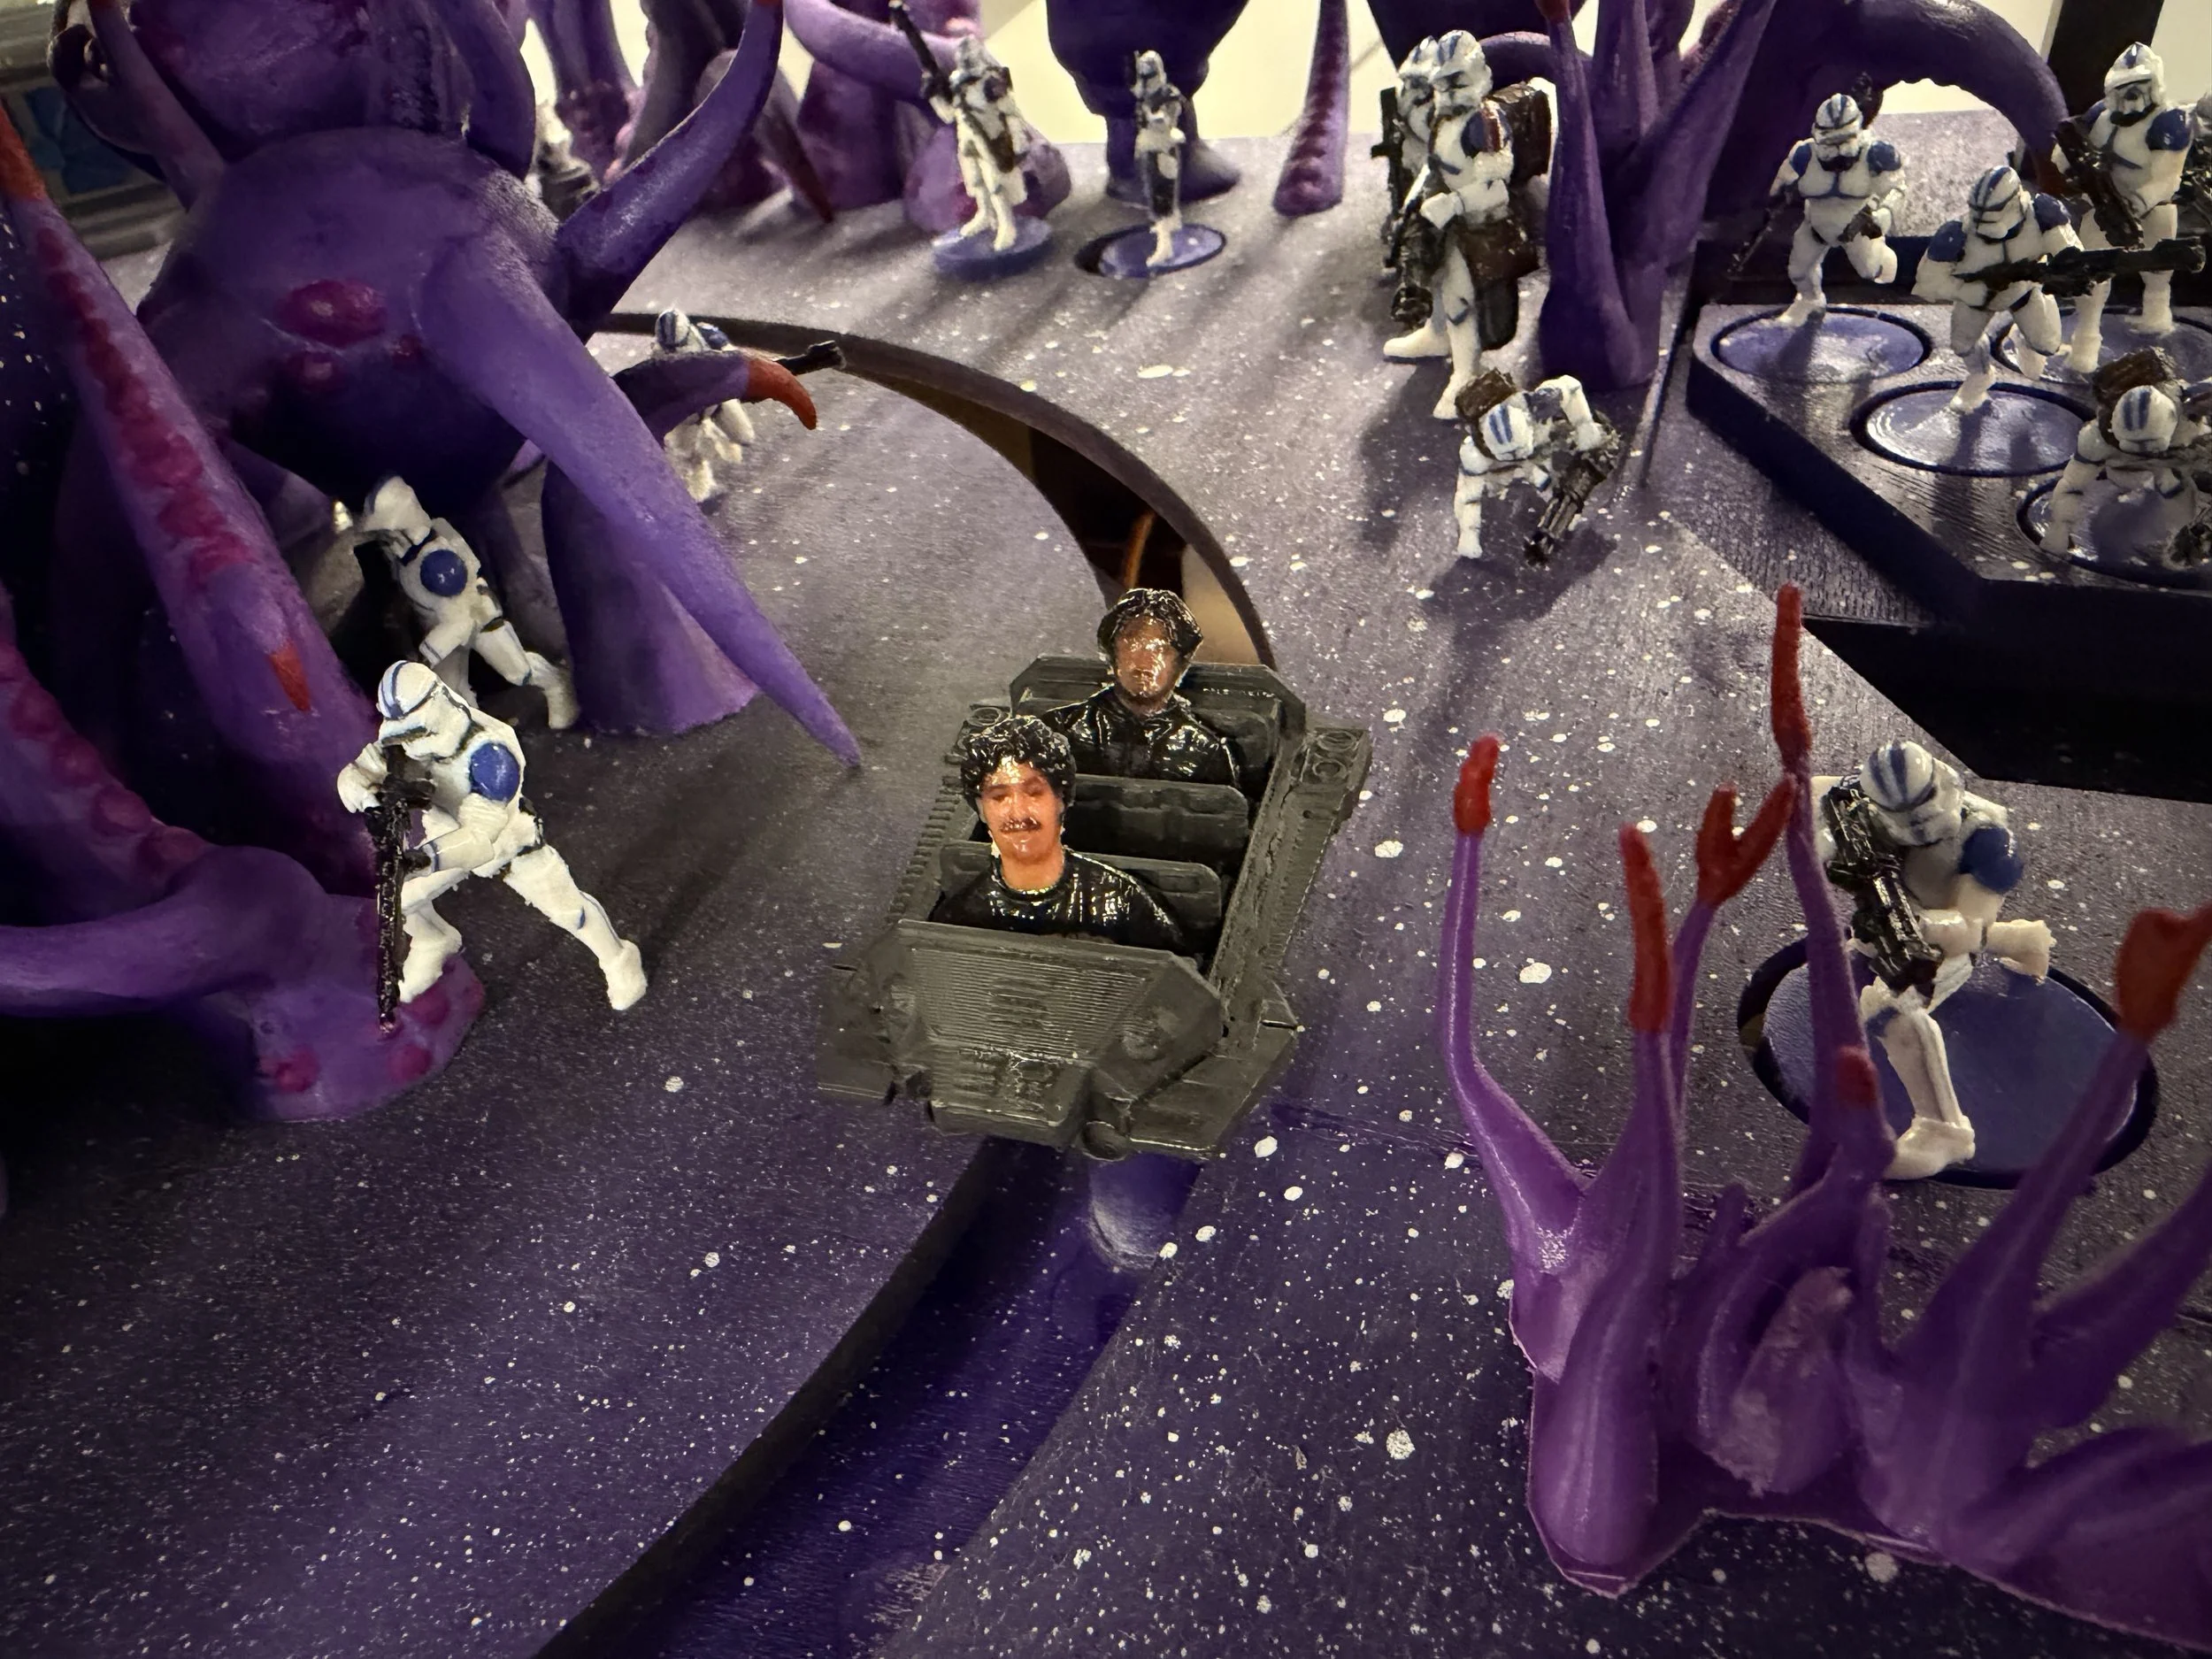
![Miniature Star Wars clones, purple alien plant, and space-themed background.]()
Our 3D-Scanned Likenesses as Ride Passengers
-
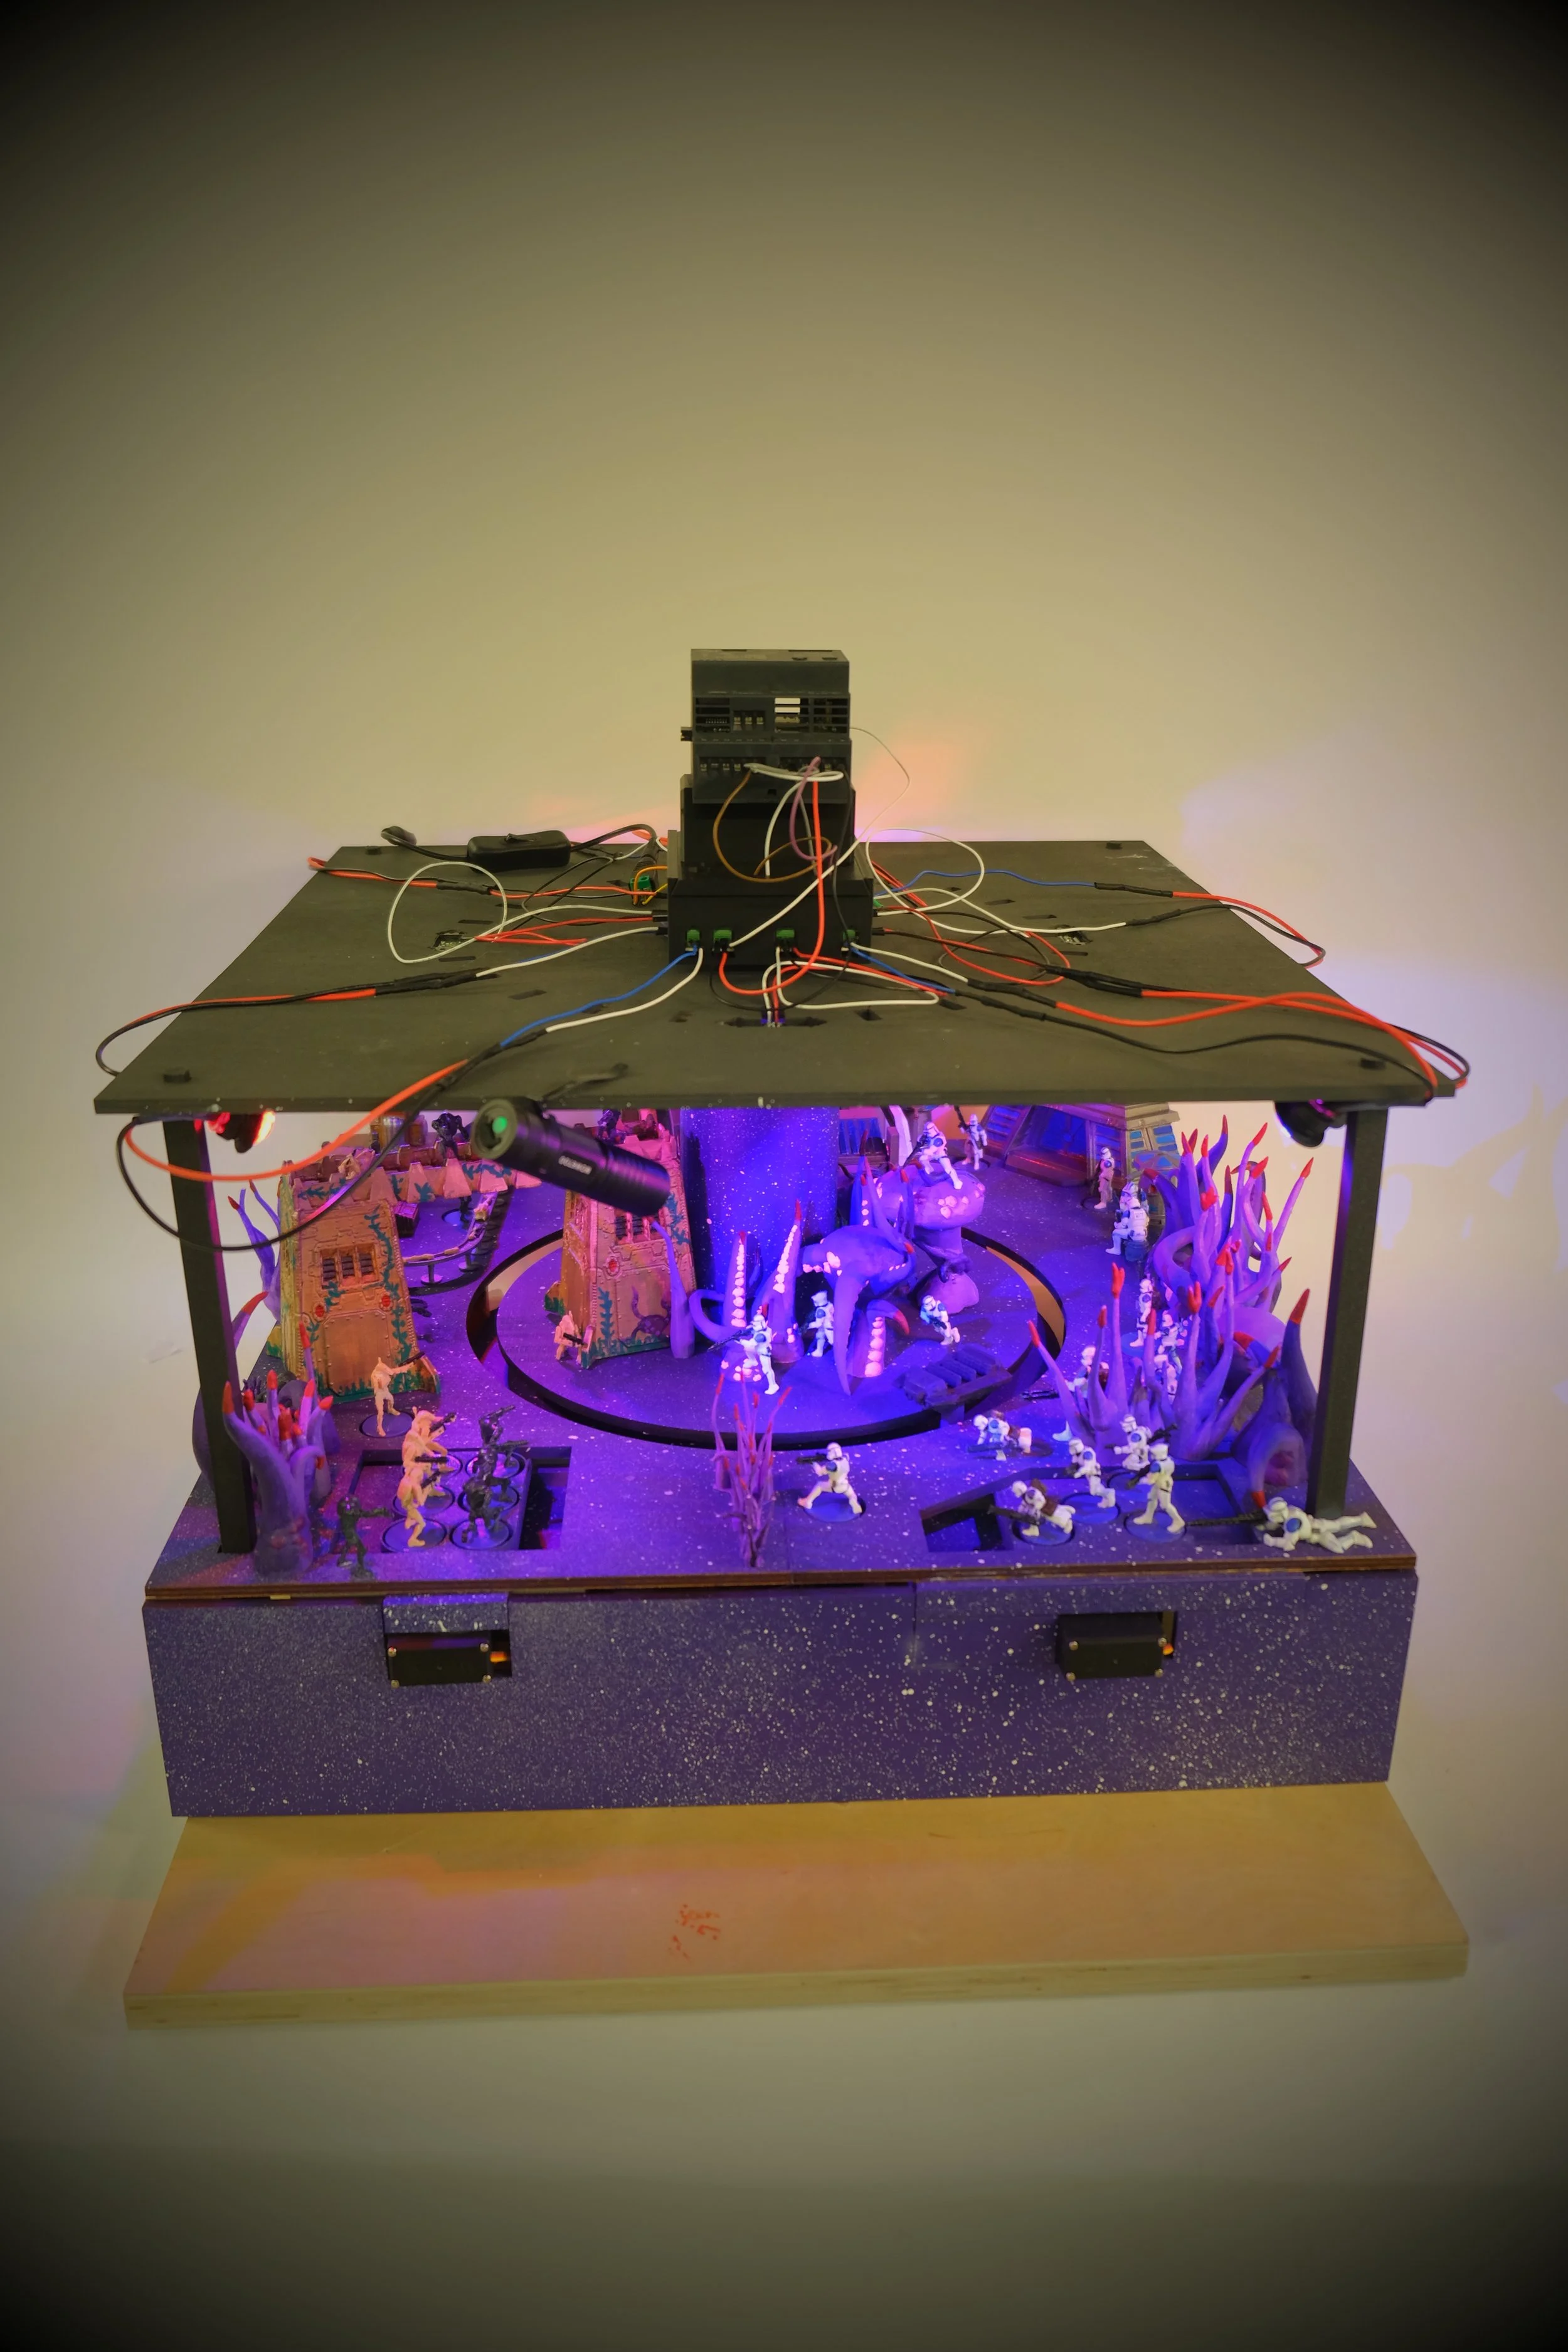
![A tabletop display featuring a miniature fantasy scene with toy soldiers, a small tower, and illuminated trees, set on a speckled black base.]()
Full-Scale View of the Finished Attraction
-
![A small robotic setup on a white table with electronic components and wires, including a breadboard, Arduino, and a belt-drive mechanism with orange and black gears.]()
Prototyping the Gear Reduction
-
![Workstation with electronic components and wires, including a breadboard, microcontroller, and power supply, set up on tables and a wooden platform in a classroom or lab environment.]()
Early Working Shell at Full Scale
-
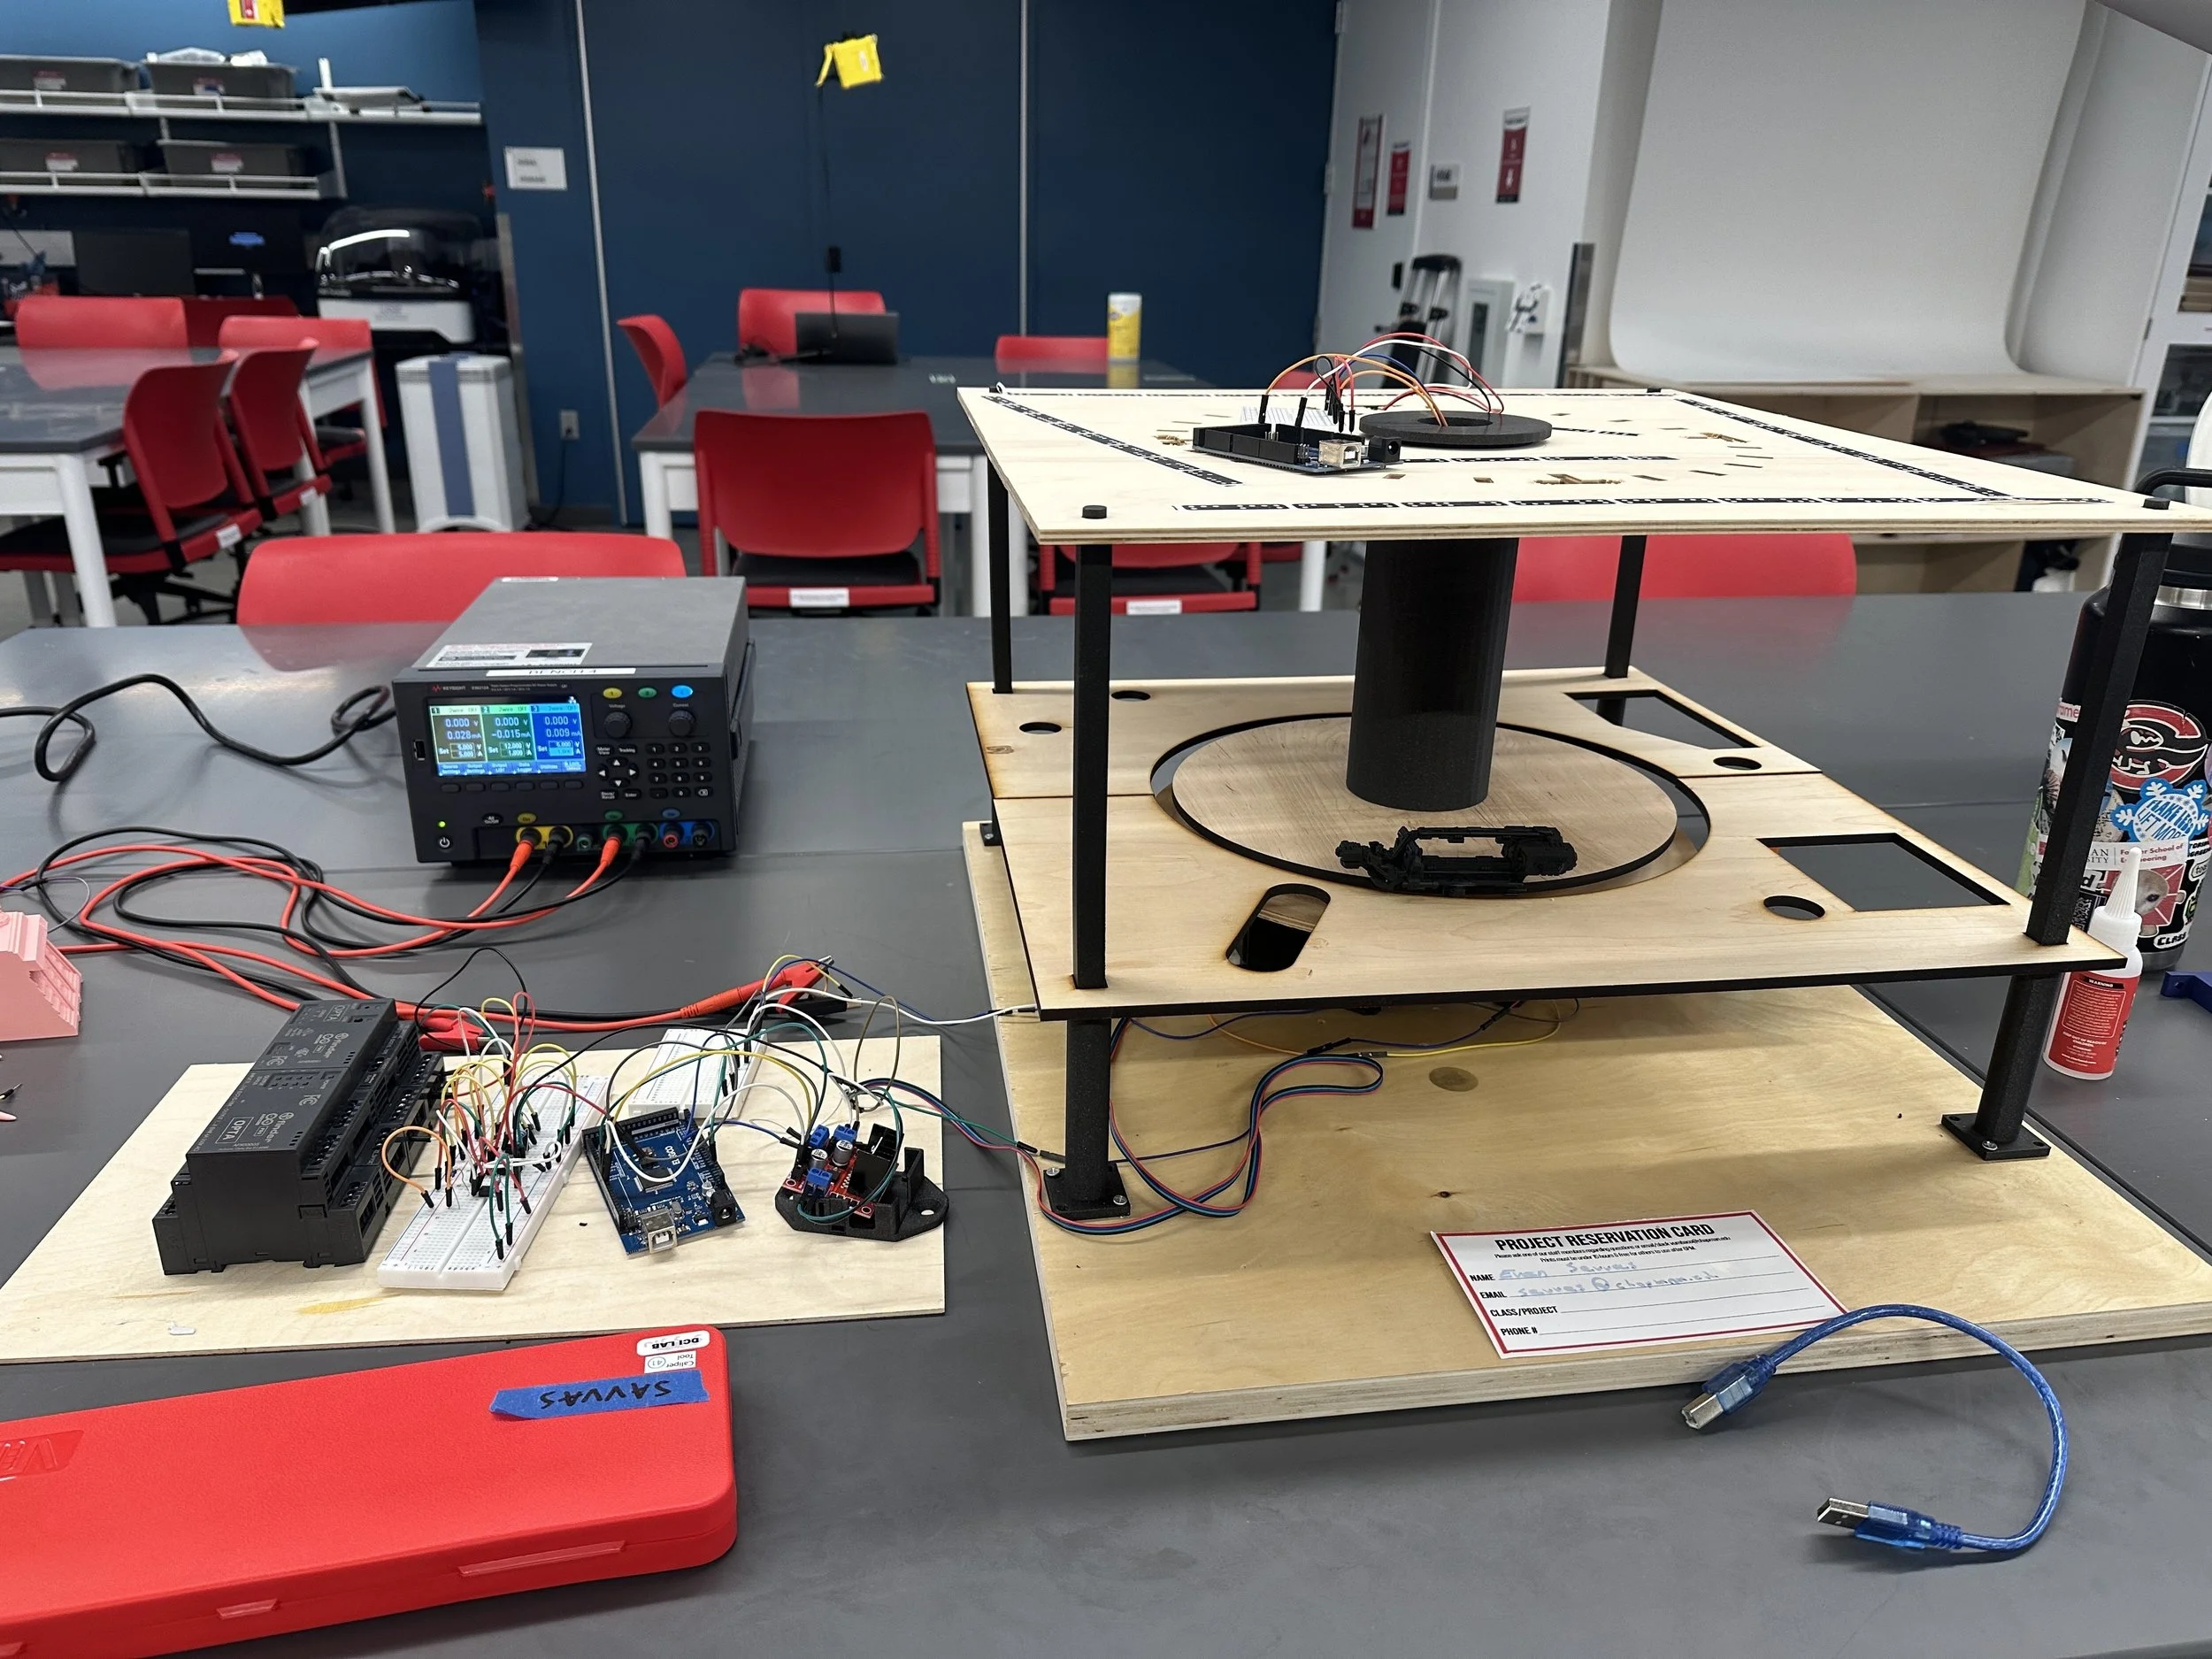
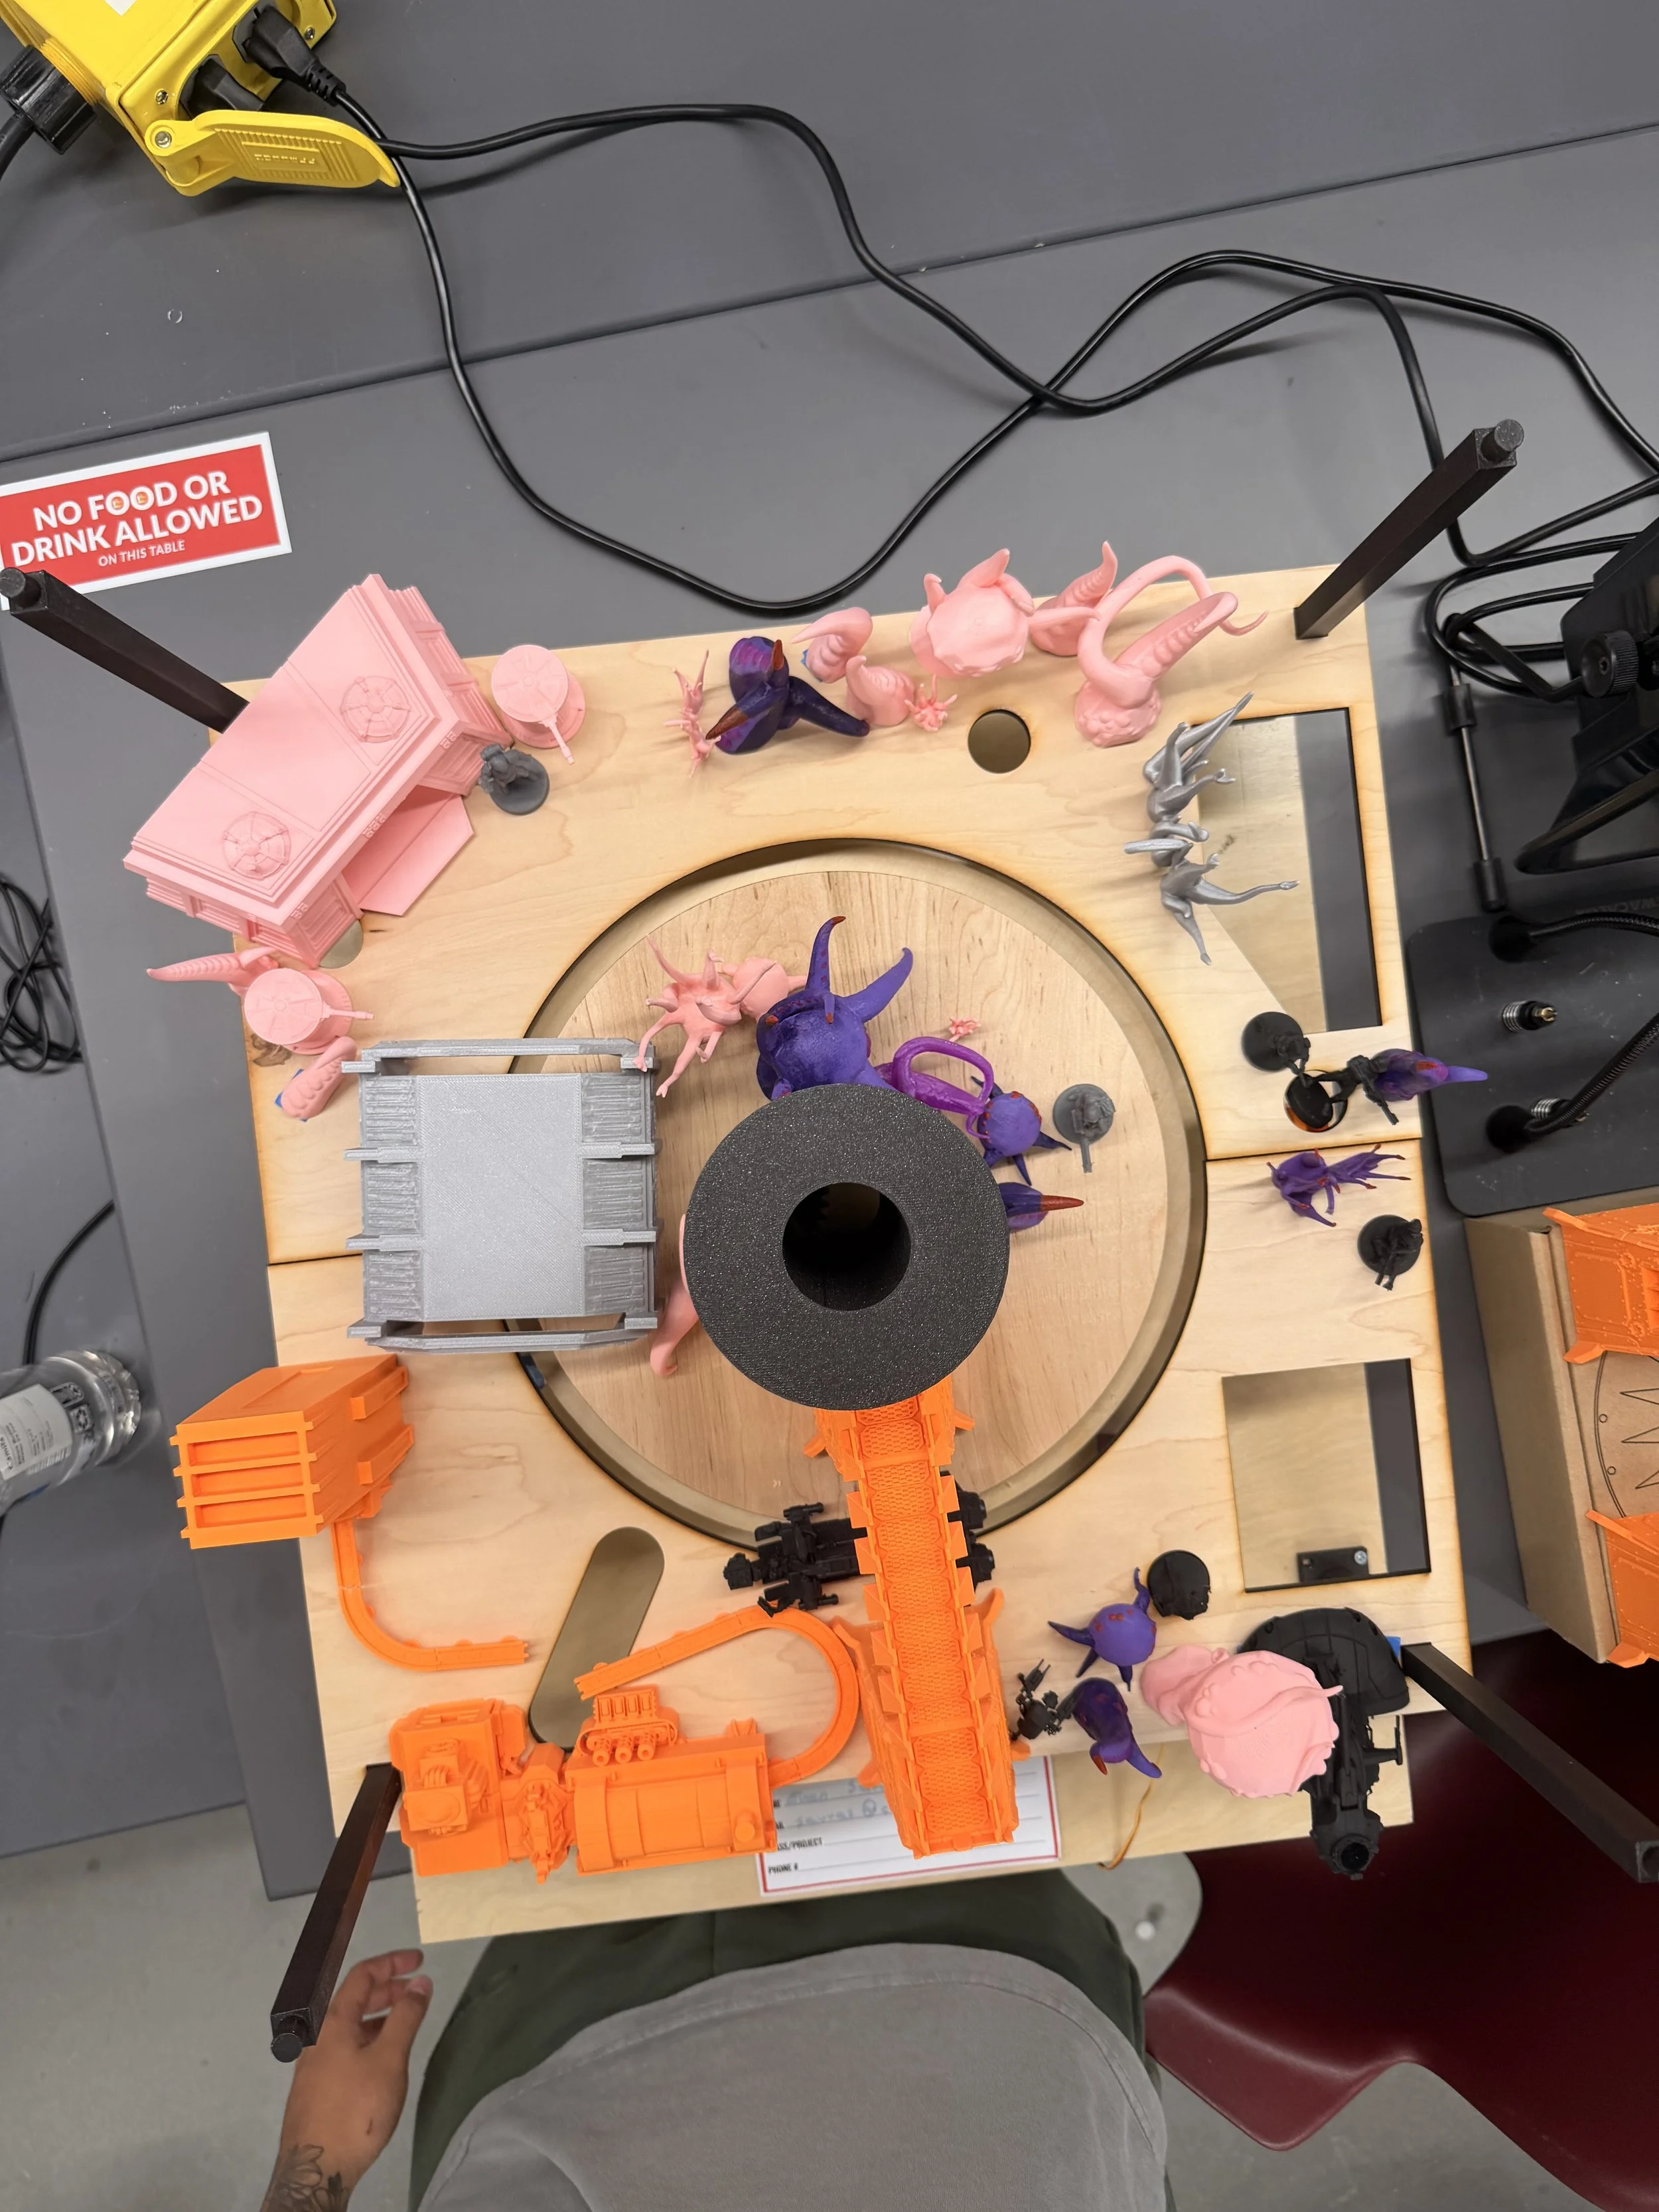
![Top-down view of a light-colored wooden table with various colorful toy figurines, orange and gray plastic tracks, and a black circular object. A person with a tattooed arm and gray pants is holding the table, with a gray chair and red chair nearby.]()
Early Set Placement Test
-
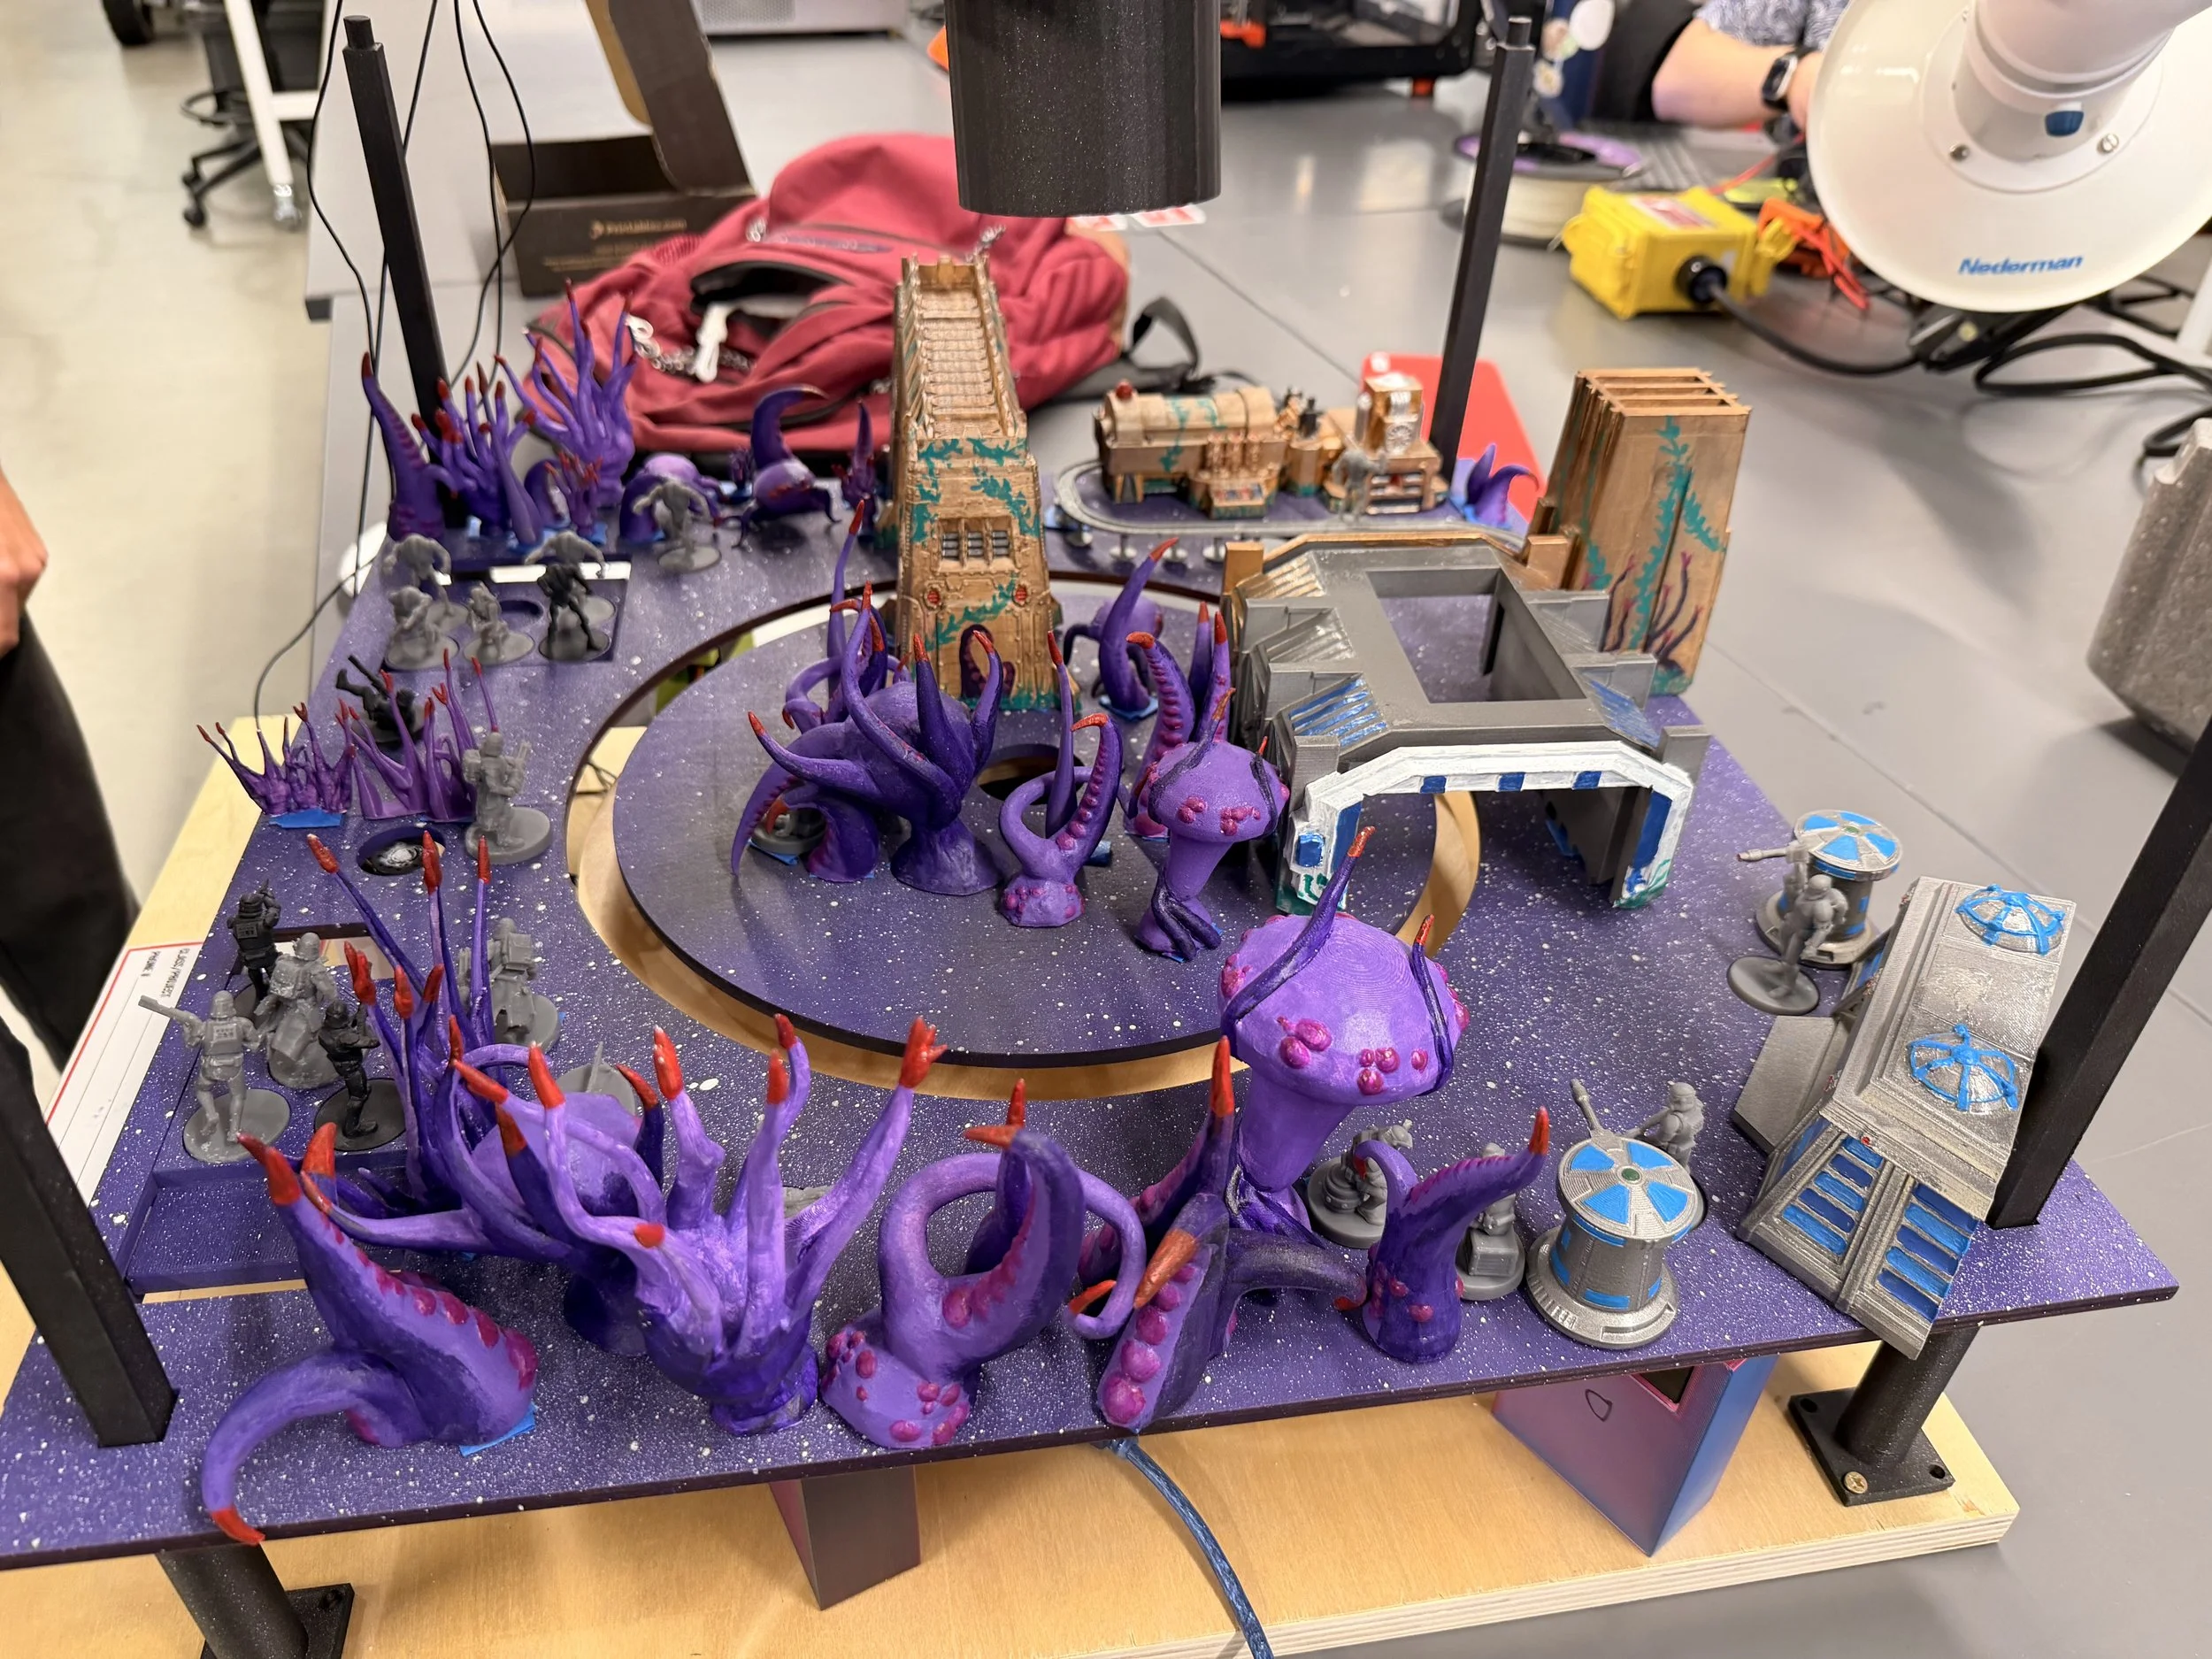
![Tabletop gaming terrain with purple tentacle-like structures, miniature buildings, and scattered miniature figurines on a speckled purple surface.]()
First Character Placement Test